|
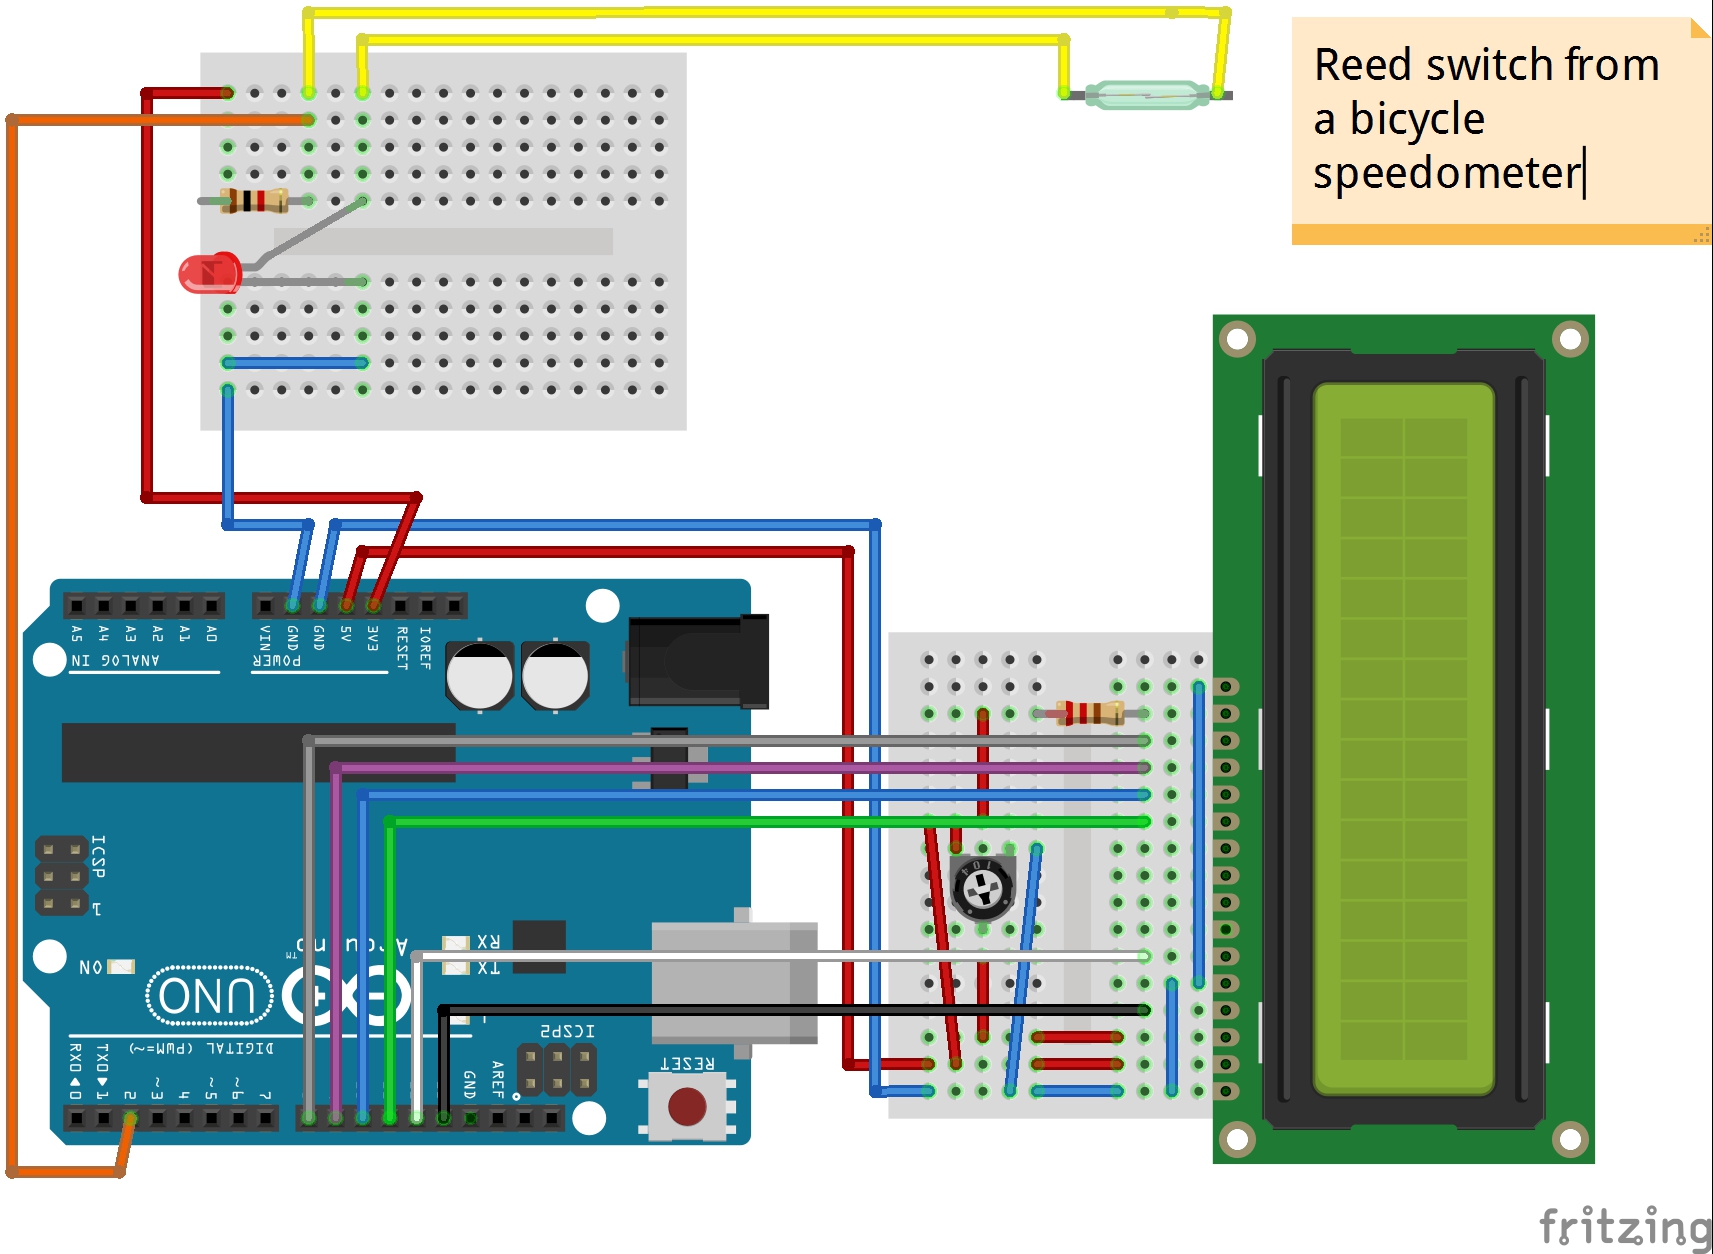
Circuito (disegnato con Fritzing) |
|
Circuit (designed with Fritzing) |
|
Quando ho deciso di fare un tachimetro con Arduino, ho cercato con Google e quasi subito ho trovato questo progetto di John Boxall (guardate l'Esempio 37.3), che sfortunatamente non comprendeva schemi del circuito e non era stato testato con un vero interruttore magnetico. |
|
When I decided to make a speedometer with Arduino, I googled around and immediately found this project by John Boxall (see Example 37.3), that unfortunately did not include circuit schematics and wasn't tested with an actual reed switch. |
|
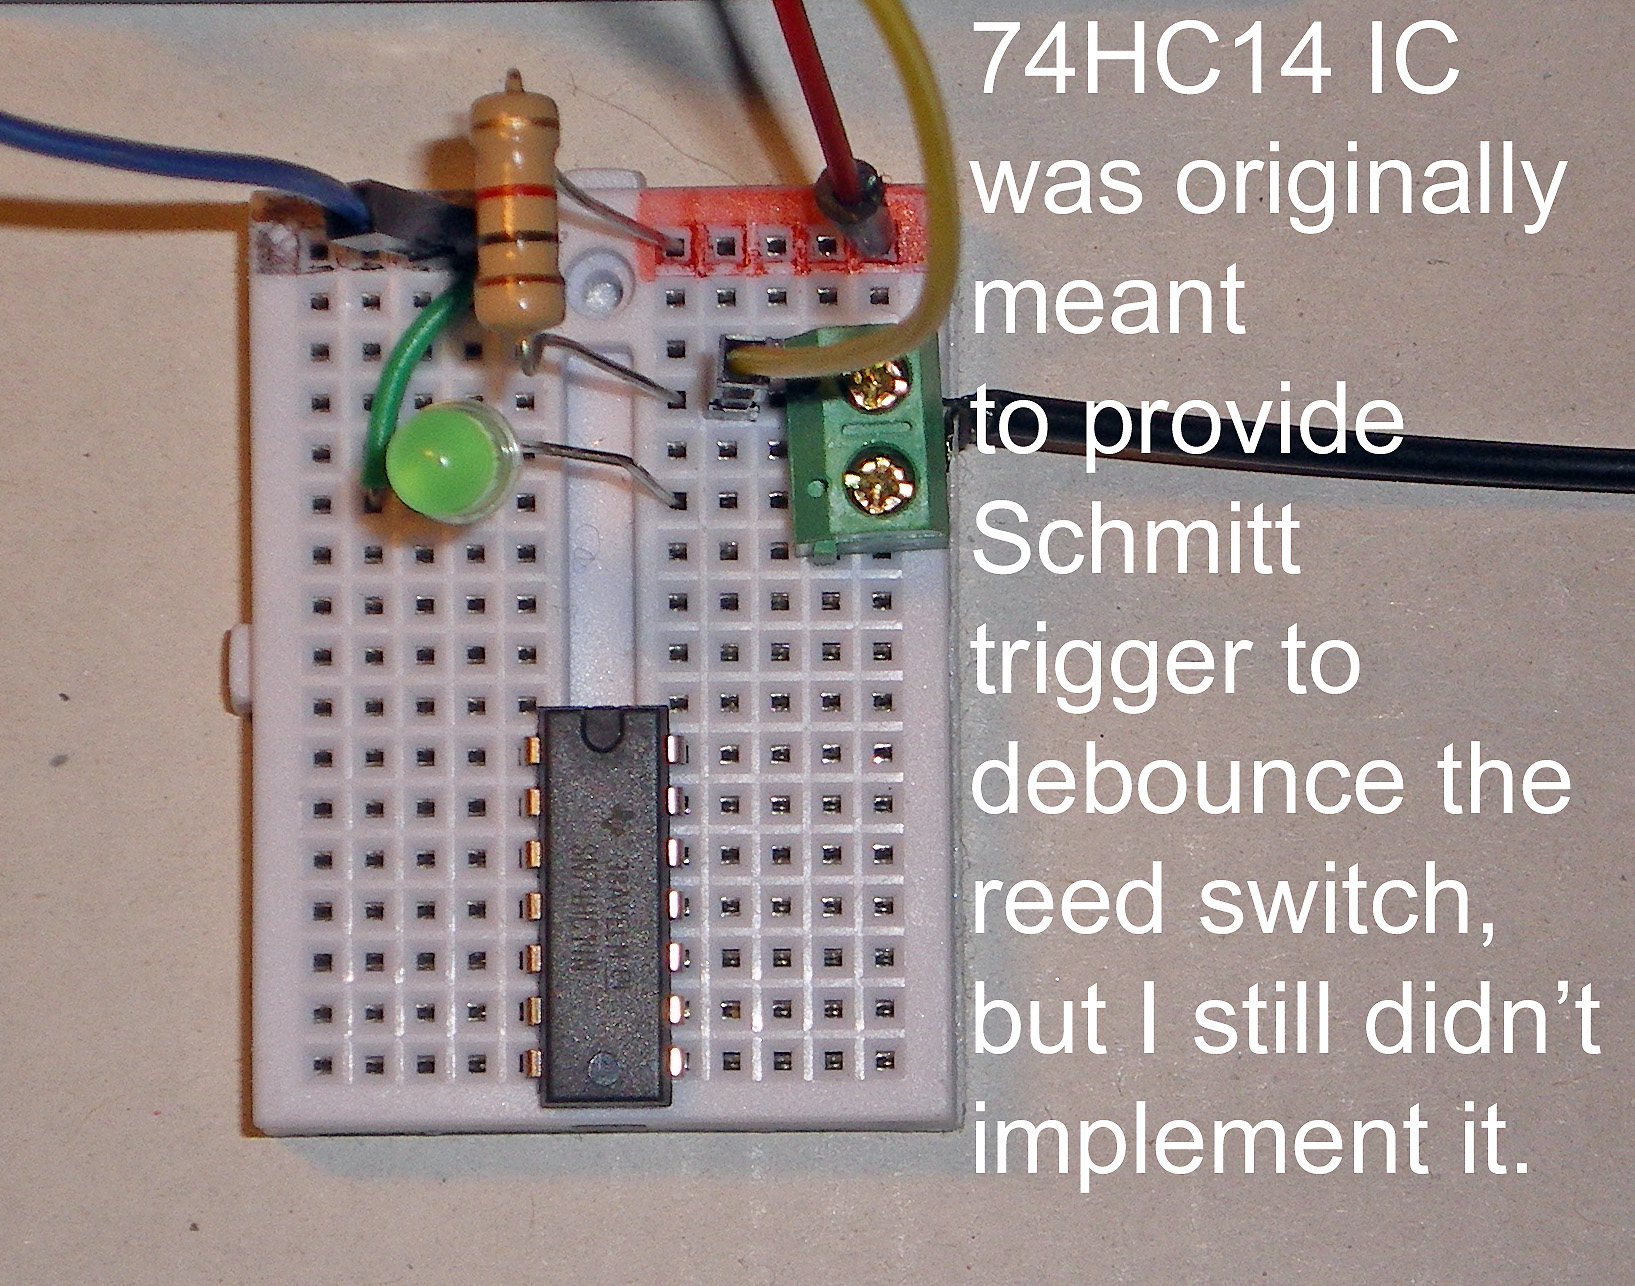
Dettaglio della micro-breadboard dove è attestato il sensore |
|
Detail of the micro-breadboard where the sensor is connected |
|
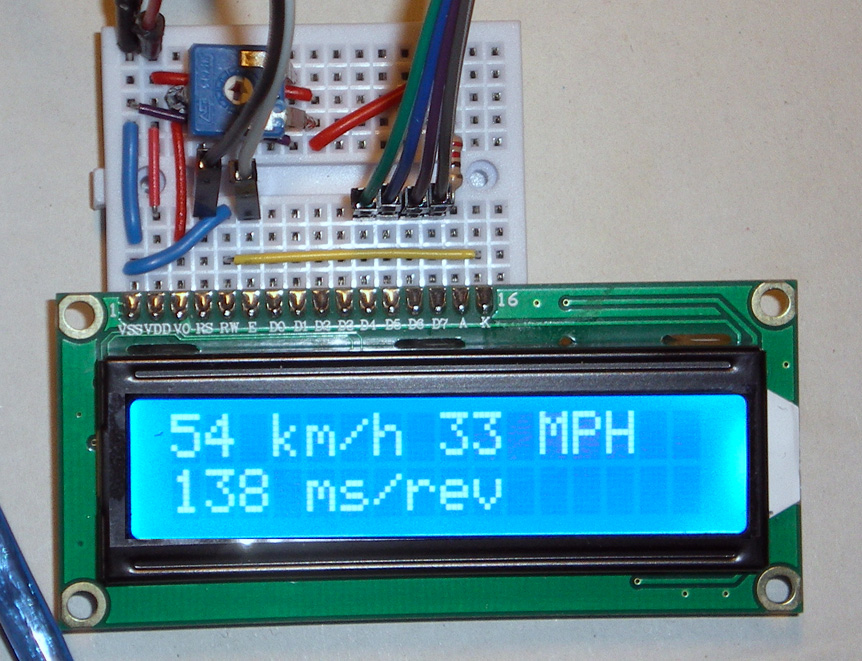
Dettaglio della micro-breadboard dove è attestato lo schermo LCD |
|
Detail of the micro-breadboard where the LCD screen is connected |
/*
  Arduino Speedometer
  by Cesare Brizio | CC by-sa-nc
  this sketch is in the public domain

  Version 1.0 - 26 february 2019
  ------------------------------
  The implementation is relatively rough:
  - wheel circumference has to be hard-coded
  - an attempt at debouncing has been made both at physical and software
    level - to no avail. Will be revised soon.
  A few more details here:
   http://www.cesarebrizio.it/Arduino/Speedometer.html

  Modified from an original by John Boxall
  Example 37.3 - Basic speedometer using millis();
  http://tronixstuff.com/tutorials > chapter 37
  John Boxall | CC by-sa-nc

  Hardware - you will need a sensor. For example - a reed switch and magnet.
  Consider the reed switch to be a normally-open button, and connect as usual
  with a pull-down resistor.

  ==========================
  The circuit for LCD board
  (HD4770 compatible display)
  4-wire dialogue
  ==========================
 * LCD RS pin to digital pin 15
 * LCD Enable pin to digital pin 14
 * LCD D4 pin to digital pin 5
 * LCD D5 pin to digital pin 4
 * LCD D6 pin to digital pin 3
 * LCD D7 pin to digital pin 2
 * LCD R/W pin to ground
 * LCD VSS pin to ground
 * LCD VCC pin to 5V
 * 10K resistor:
 * ends to +5V and ground
 * wiper to LCD VO pin (pin 3)

*/

// include the library code:
#include <LiquidCrystal.h>

// initialize the library with the numbers of the interface pins
const int rs = 13, en = 12, d4 = 11, d5 = 10, d6 = 9, d7 = 8;
LiquidCrystal lcd(rs, en, d4, d5, d6, d7);

float start, finished;
float elapsed, time;
float circMetric=2.093; // wheel circumference (in meters)
float circImperial; // using 1 kilometer = 0.621371192 miles
float speedk, speedm;    // holds calculated speed vales in metric and imperial

void setup()
{
  // convert metric to imperial for MPH calculations
  circImperial=circMetric*.62137;

  // the syntax with digitalPinToInterrupt should allow portability
  //among different Arduino models - see https://www.arduino.cc/reference/en/language/functions/external-interrupts/attachinterrupt/
  attachInterrupt(digitalPinToInterrupt(2), speedCalc, RISING); // interrupt called when sensors sends digital 2 high (every wheel rotation)
  //attachInterrupt(0, speedCalc, RISING); // interrupt called when sensors sends digital 2 high (every wheel rotation)

  //start now (it will be reset by the interrupt after calculating revolution time)
  start=millis();

  // set up the LCD's number of columns and rows:
  lcd.begin(16, 2);

  // Print a transitory message to the LCD.
  lcd.print("Ardu-Speedometer");
  delay(2000); //just to allow you to read the initialization message

  // top serial dialogue speed improves precision
  Serial.begin(115200);
}

void speedCalc()
{
  //Function called by the interrupt

  if((millis()-start)>100) // 100 millisec debounce
    {
    //calculate elapsed
    elapsed=millis()-start;

    //reset start
    start=millis();

    //calculate speed in km/h
    speedk=(3600*circMetric)/elapsed;

    //calculate speed in mph
    speedm=(3600*circImperial)/elapsed;
    }
}

void loop()
{
  // The loop will be interrupted by the sensor each time the
  // magnet passes near the sensor, in other words once per revolution

  // Top line in the 16 char, 2 lines display - speed data
  lcd.setCursor(0,0);
  lcd.print("                ");
  lcd.setCursor(0,0);
  lcd.print(int(speedk));
  lcd.print(" km/h ");
  lcd.print(int(speedm));
  lcd.print(" MPH ");

  //bottom line the 16 char, 2 lines display - time data
  lcd.setCursor(0,1);
  lcd.print("                ");
  lcd.setCursor(0,1);
  lcd.print(int(elapsed));
  lcd.print(" ms/rev      ");

  // adjust for personal preference to minimise flicker
  //delay(250);
}
❦