|
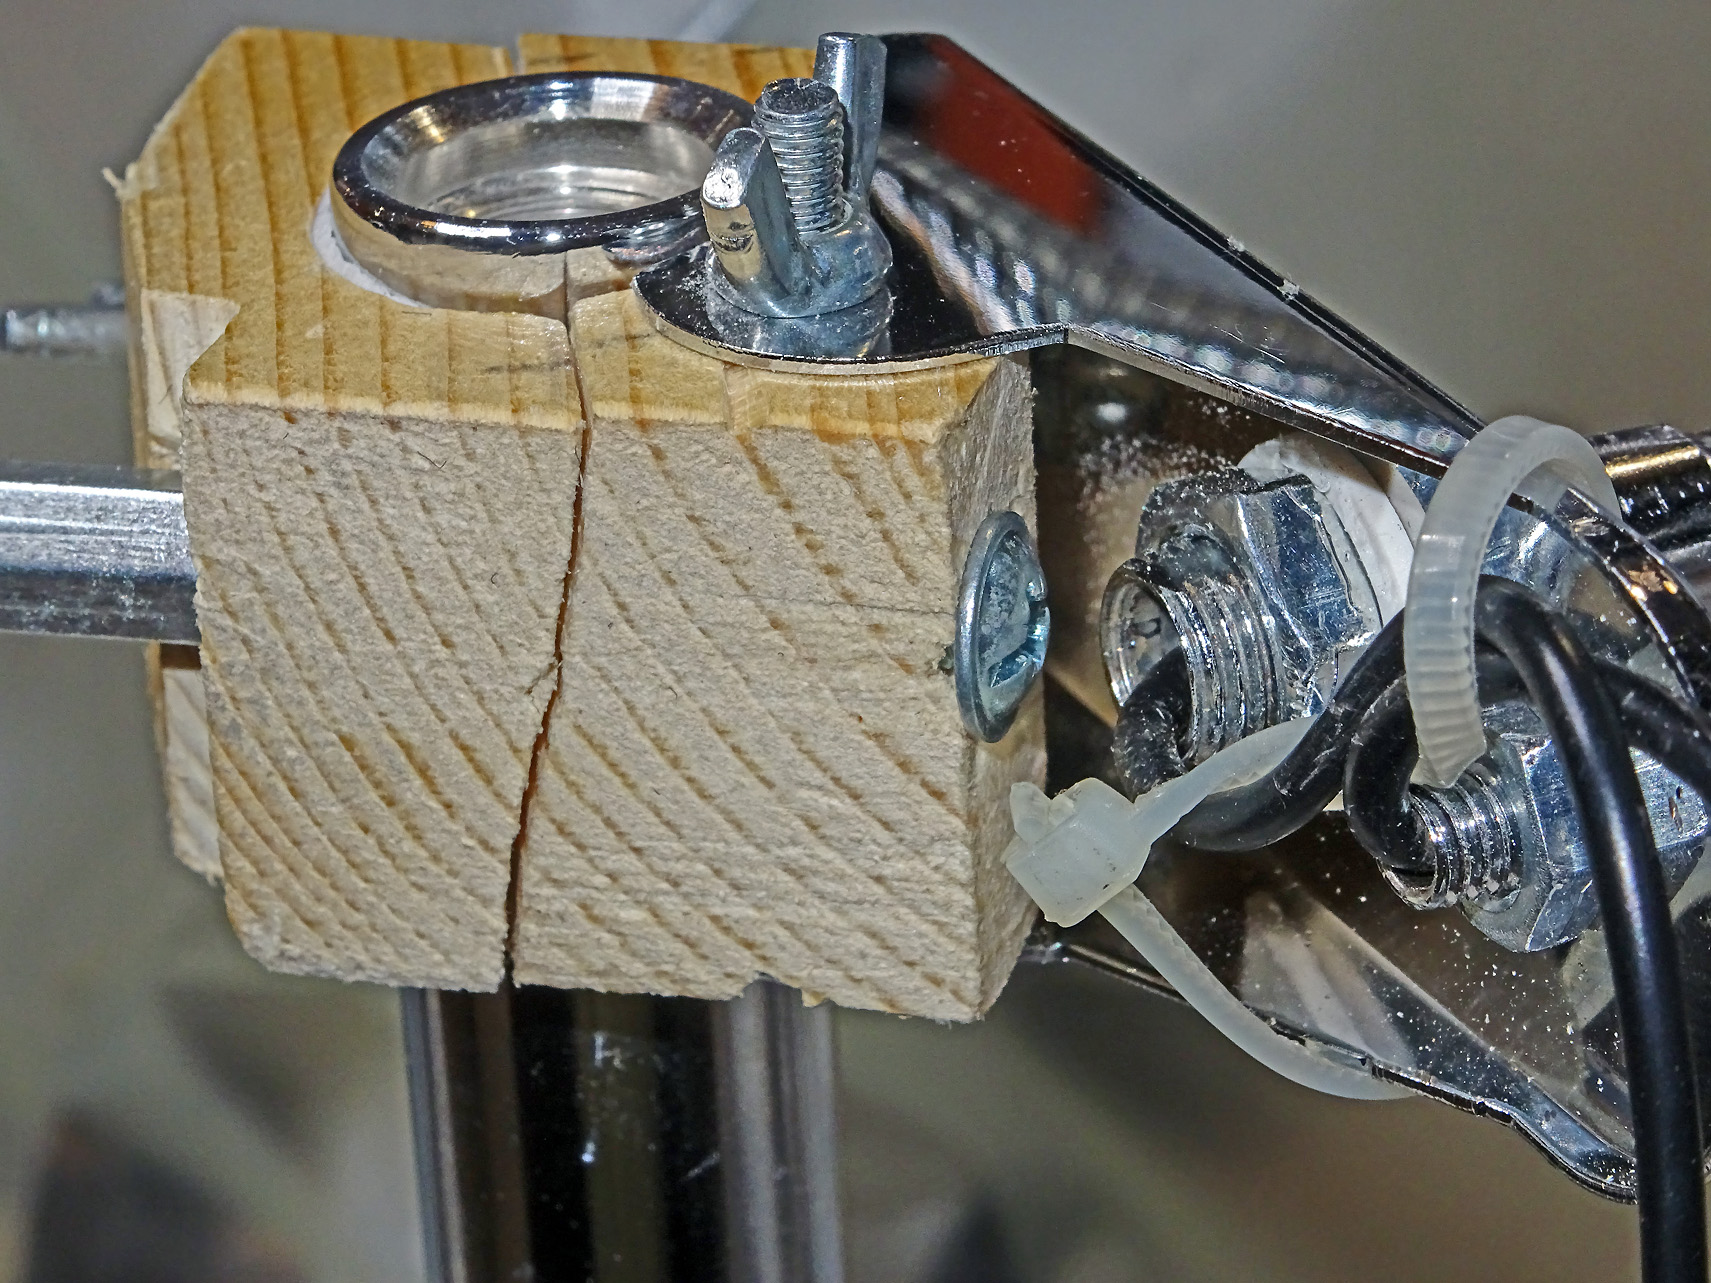
Quindi ho costruito un morsetto in legno...
- ho smontato l'inutile grande clip di metallo
- ho tenuto la mezza clip con gli attacchi per i due colli d'oca, eliminandone il cuscinetto e tagliando / limando il metallo secondo necessità per evitare che, una volta montato, interferisse con la colonna
- ho trovato un blocchetto di legno (circa 5 x 5 x 3 cm)
- ho fatto un buco con lo stesso diametro della colonna del mio supporto per microscopio (nel mio caso, 20 mm) nel blocco di legno
- ho tagliato il blocco di legno in due lungo il diametro massimo del foro
- ho carteggiato per rendere il buco abbastanza abbondante da contenere un sottile rivestimento in gomma
- ho limato quattro punti del blocco per ottenere una faccia perpendicolare per una foratura più facile
- ho praticato due fori da 4 mm di diametro sui lati del blocco, per le viti che verranno serrate per bloccare il supporto sulla colonna
- ho praticato un foro perpendicolare simile in uno degli angoli per fissare la clip originale al morsetto
- ho incollato il rivestimento in gomma sulla superficie in legno a contatto con la colonna
- ho montato il tutto.
Nelle immagini sopra e sotto, il morsetto è montato nella parte superiore della colonna per una migliore visione delle sue parti.
Then I built a wooden clamp...
- I disassembled the useless big metal clip
- I kept just the prong with the attachments for the two goosenecks, cutting away its pad and cutting/filing it as needed to avoid that, once mounted, it would interfere with the column
- I found a small piece of wood (around 5 x 5 x 3 cm)
- I made a hole with the same diameter of the column of my microscope stand (in my case, 20mm) in the block of wood
- I cut the block of wood in two along the maximum diameter of the hole
- I sanded it to make the hole abundant enough to house a thin rubber lining
- I filed four points of the block to provide a perpendicular face for an easier drilling
- I drilled two 4 mm diameter holes across the sides of the block, for the screws that will be tightened to clamp the block on the column
- I drilled one similar, perpendicular hole in one of the corners to fix the prong from the original clip
- I glued the rubber lining to the wooden surface in contact with the column
- I Assembled everything.
In the pictures above and below, the clamp is mounted at the top of the column for a better view of its parts.
|
|
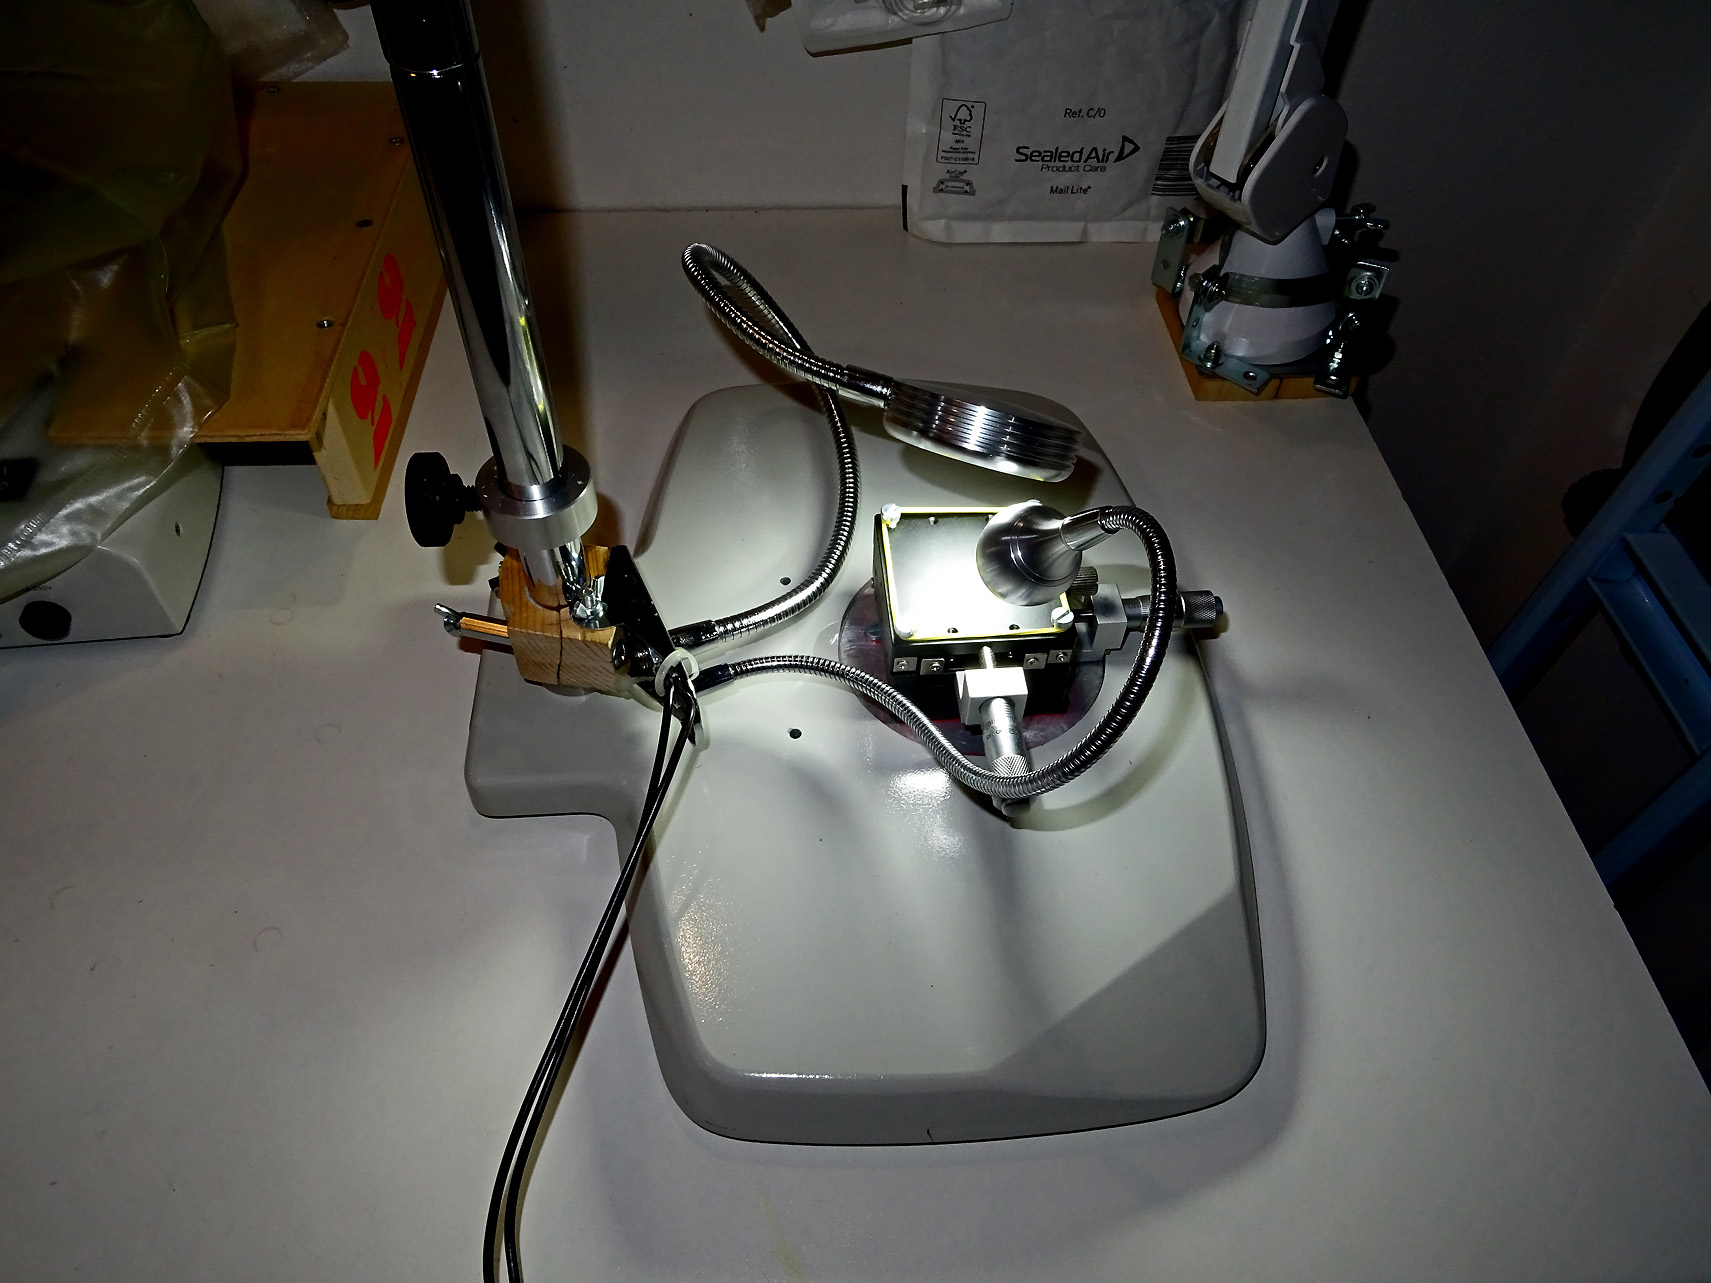
Nall'immagine sotto, il morsetto è nella sua posizione operativa.
L'interruttore consente di attivare in modo indipendente le due luci, una diffusa e una concentrata. La luminosità può essere regolata in dieci passi, dal minimo al massimo.
Ovviamente, per fornire energia elettrica serve una porta USB, che può essere una qualsiasi porta USB del computer o meglio un alimentatore USB dedicato come quello descritto nel mio progetto di un softbox / lightbox dimmerabile.
In the picture below, the clamp is in its operating position.
The switch allows to activate independently the two lights, one diffused and one concentrated. Brightness can be dimmed in ten steps, from minimum to maximum.
Obviously, to provide electrical power you need one USB port, that may be any USB port of your computer or better a dedicated USB power supply like the one described in my project of a dimmable softbox / lightbox.
|