Cesare Brizio
|
Approccio a basso costo per la fotografia con obiettivi da microscopio Fate click sulle immagini in anteprima per allargarle |
|
Low-cost approach to photography with microscope objectives Click on the preview images to enlarge them |
|
Il sogno di emulare i giganti della fotomicrografia (artisti come Levon Biss, Charles Krebs, Séb Malo, Kamil Stajniak e molti altri ...) si arena sulla roccia più pericolosa: il costo dell'attrezzatura. Abbassando le proprie aspettative ad un risultato ragionevolmente buono, anche se tutt'altro che perfetto, si possono ottenere immagini soddisfacenti accoppiando l'obiettivo di un microscopio con qualsiasi dispositivo di imaging, videocamera o fotocamera, senza nemmeno bisogno di un microscopio completo.
The dream to emulate the giants of photomicrography (artists such as Levon Biss, Charles Krebs, Séb Malo, Kamil Stajniak and many others...) runs aground on that most dangerous of rocks: equipment cost. By lowering one's expectations to a reasonably good - although far from perfect - result, one can obtain quite satisfactory pictures by coupling a microscope objective with any imaging device, videocamera or photocamera, without even needing a full microscope.
|
|
|
|
|
|
La maggior parte degli obiettivi del microscopio sono costruiti per fornire immagini generate dalla luce trasmessa, passando attraverso sottili diapositive traslucide: la loro profondità di campo è marginale, fino a pochi centesimi di millimetro, e spesso la loro qualità dipende dall'uso di un oculare coordinato. In senso generale, è sconsigliabile utilizzare un obiettivo per luce trasmessa al di fuori del suo ambito d'impiego previsto, per riprendere immagini a luce riflessa di un soggetto opaco.
Most microscope objectives are built to deliver images generated by transmitted light, passing through thin translucent slides: their depth of field is marginal, down to a few hundredths of millimeter, and often their quality depends on the use of a coordinated eyepiece. In a general sense, is unadvisable to use a transmitted light objective out of its intended scope, to take reflected light pictures of an opaque subject, |
|
|
|
|
|
|
|
|
Per posizionare un'immagine di qualità ottimale sul sensore del dispositivo di imaging, è necessario assicurarsi che la distanza tra l'adattatore obiettivo (il piano su cui è fissato l'obiettivo) e il sensore sia uguale alla lunghezza del tubo per la quale è stato progettato l'obiettivo.
To place an optimum quality image on the sensor of the imaging device, one needs to ensure that the distance between the objective adapter (the plane on which the objective is screwed) and the sensor is equal to tube length for which the objective is designed. |
|
|
|
|
|
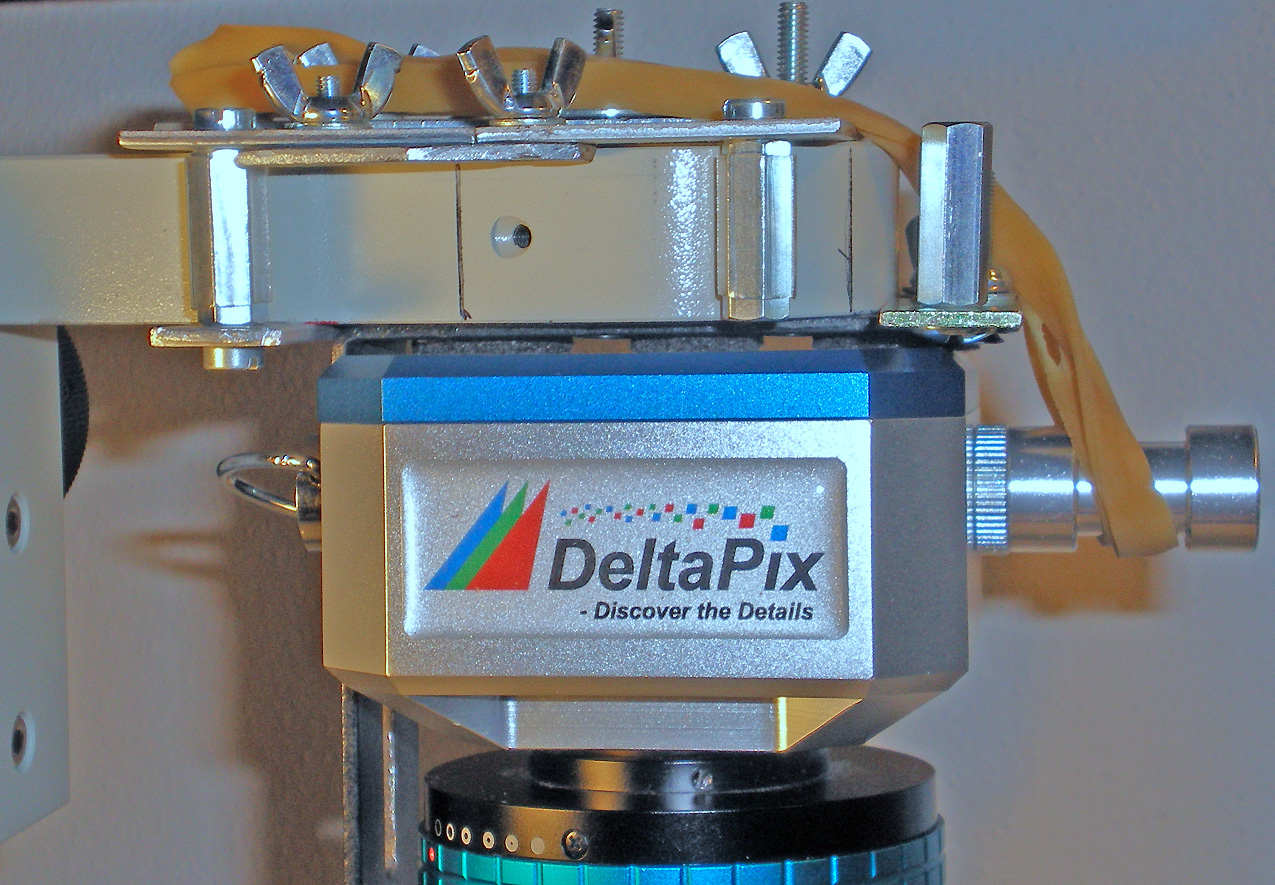
Lo svantaggio principale quando si utilizzano obiettivi da microscopio è la dimensione molto piccola dell'area inquadrata. Questo problema viene esacerbato quando il sensore di imaging è più piccolo del diametro (circa 20 mm) dell'immagine generata dall'obiettivo. Ad esempio, il sensore della mia videocamera, una DeltaPix Invenio 8DII è 7,3 mm x 5,5 millimetri. Accoppiato con un obiettivo 10x, inquadra un'area di circa 0,6 mm di larghezza. Per contro, alla minore area inquadrata corrisponde la massima qualità di immagine, generata dalla sezione centrale delle lenti dell'obiettivo, a esclusione della periferia dell'immagine.
The main drawback when employing microscope objectives is the very small size of the framed area. This problem is exacerbated when the imaging sensor is smaller than the diameter (around 20mm) of the image generated by the objective. As an example, the sensor of my videocamera, a DeltaPix Invenio 8DII is 7.3mm x 5.5mm. Coupled with a 10x objective, it frames an area around 0.6 mm wide. On the other hand, the smaller framed area corresponds to the maximum image quality, generated by the central section of the lens of the lens, excluding the periphery of the image. |
|
|
|
|
|
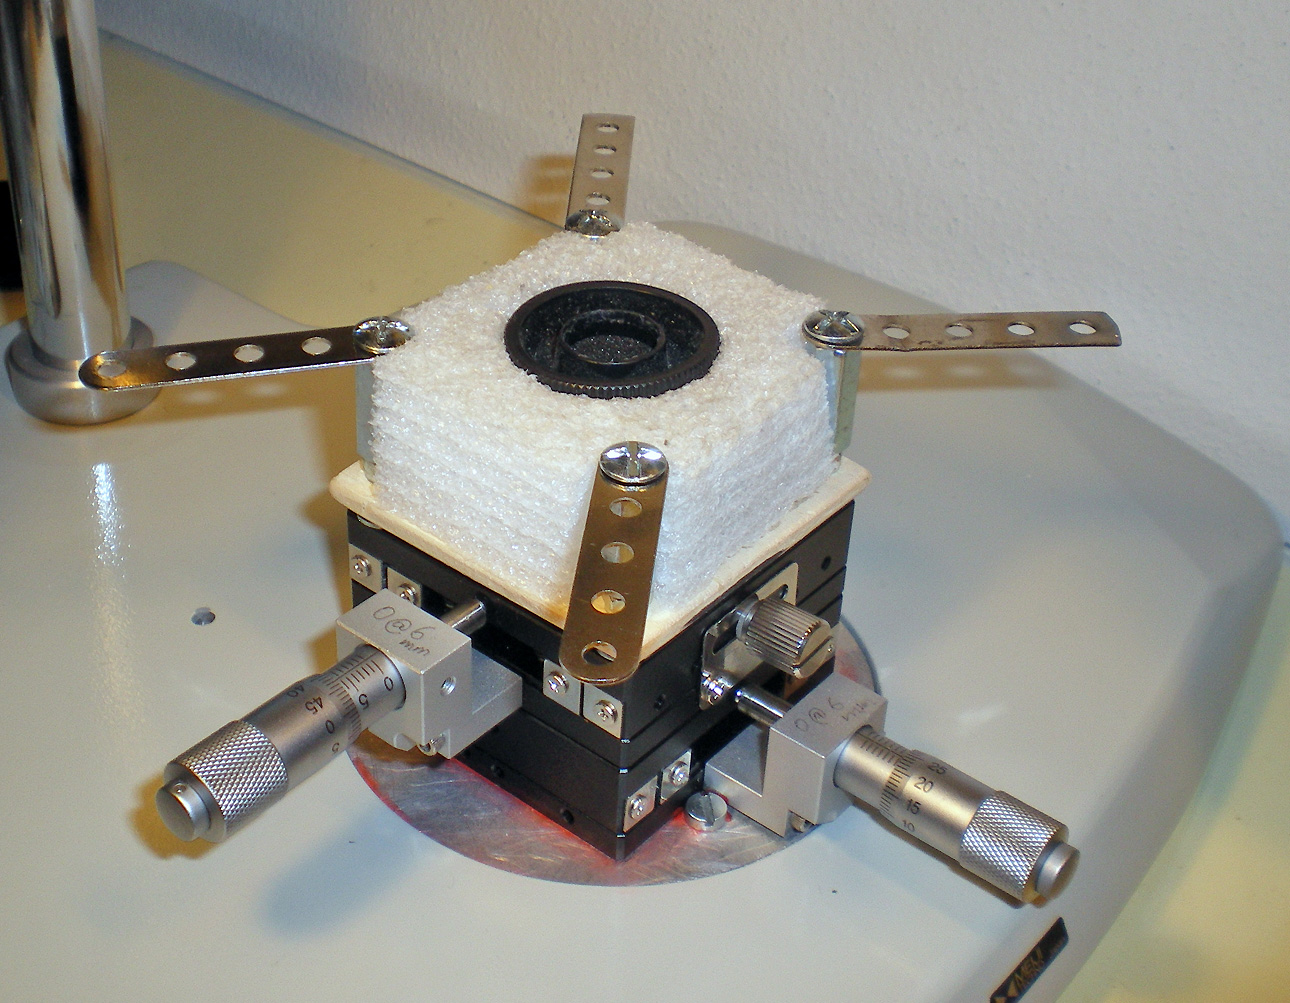
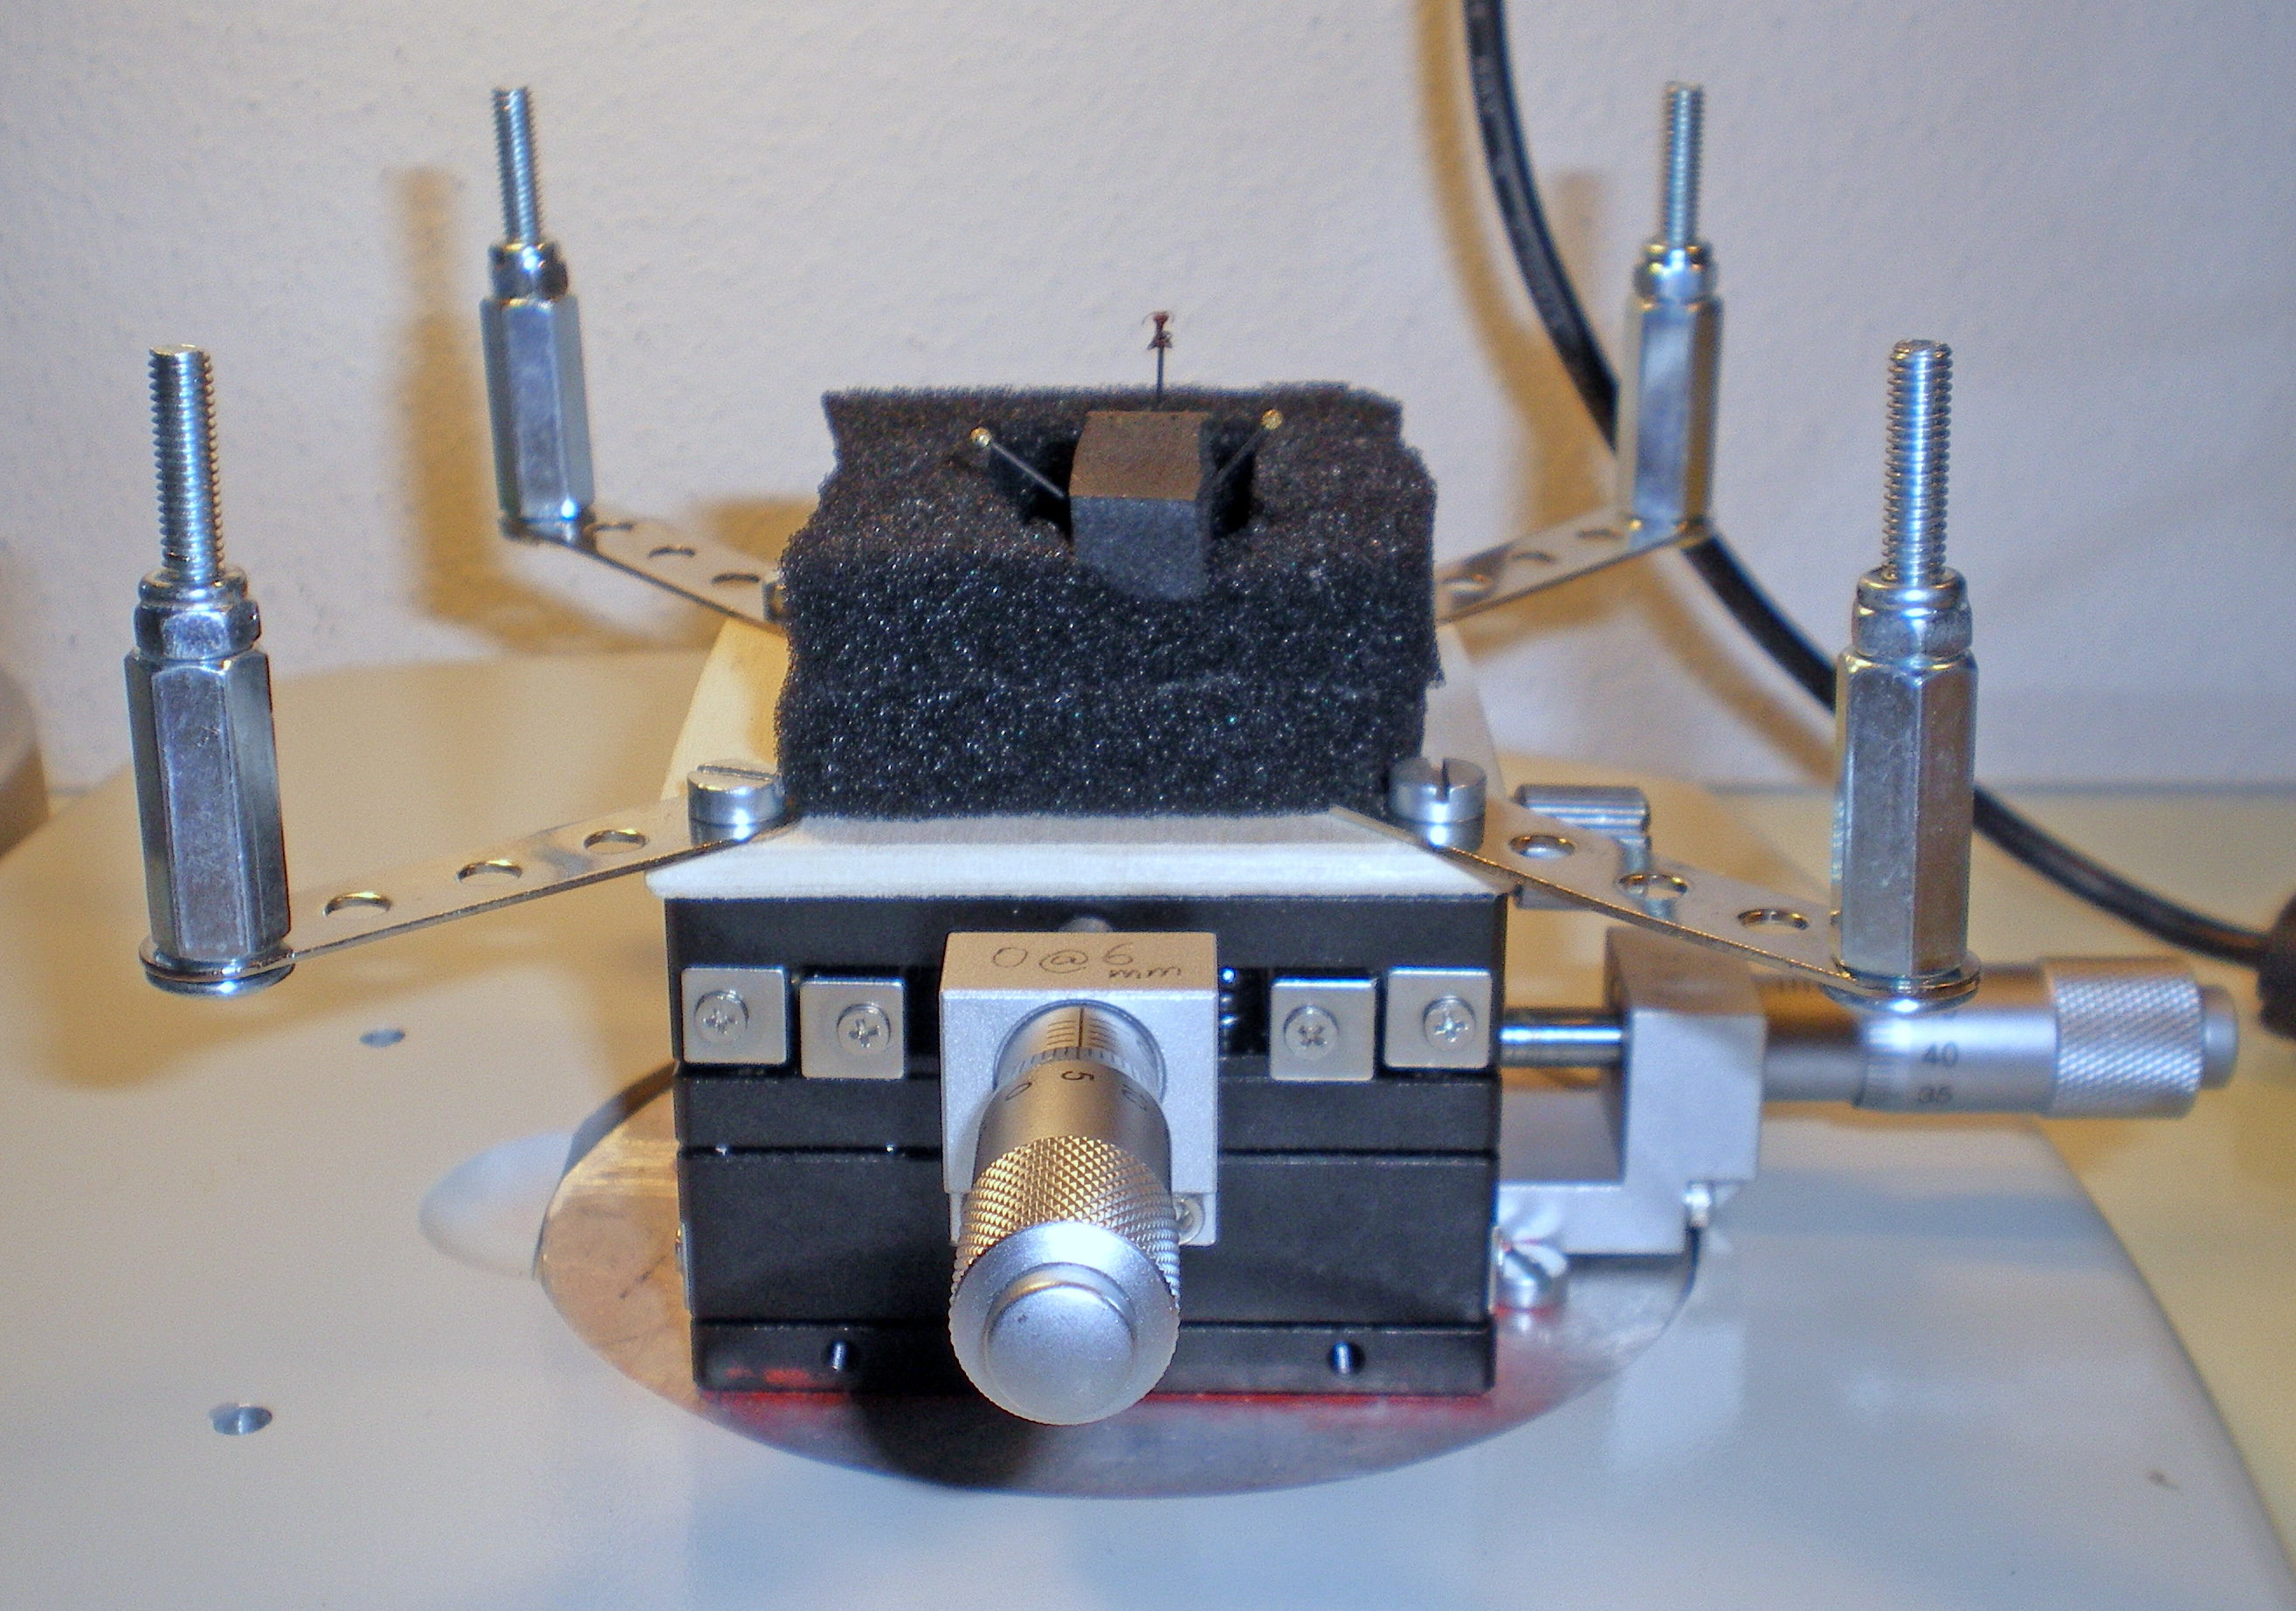
Il controllo micrometrico sull'asse Z può essere ottenuto mediante apposite rotaie micrometriche che si possono accoppiate a uno stand generico, nonché con il blocco di messa a fuoco di un microscopio, possibilmente con regolazioni grossolane e fini.
The micrometrical control on the Z-axis can be obtained by special micrometric rails that can be coupled to a general purpose stand, as well as with the focusing block of a microscope, possibly with coarse and fine adjustments. |
|
|
|
|
|
|
|
|
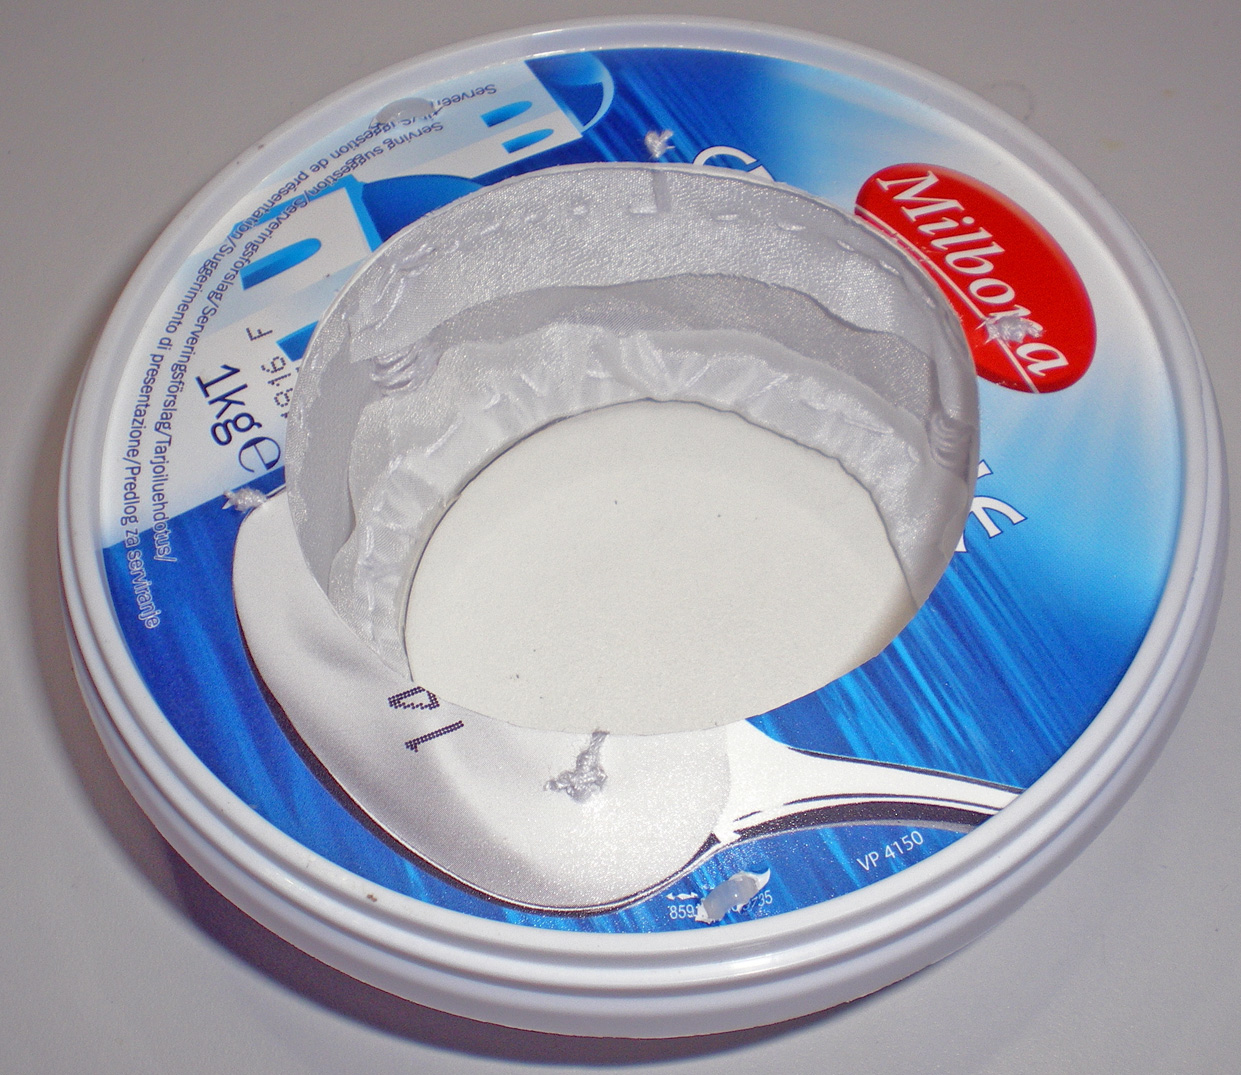
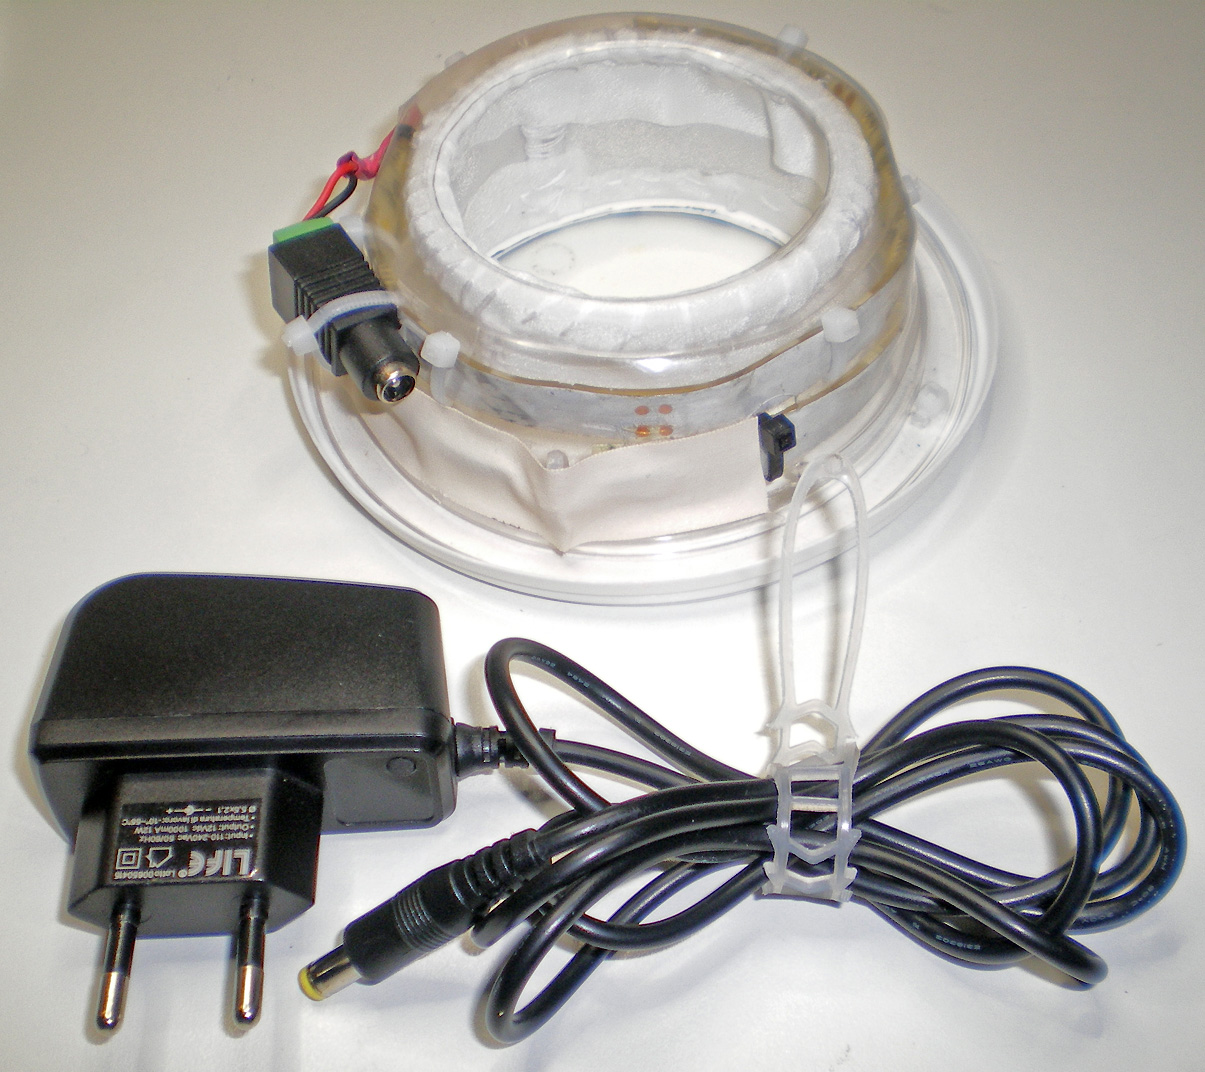
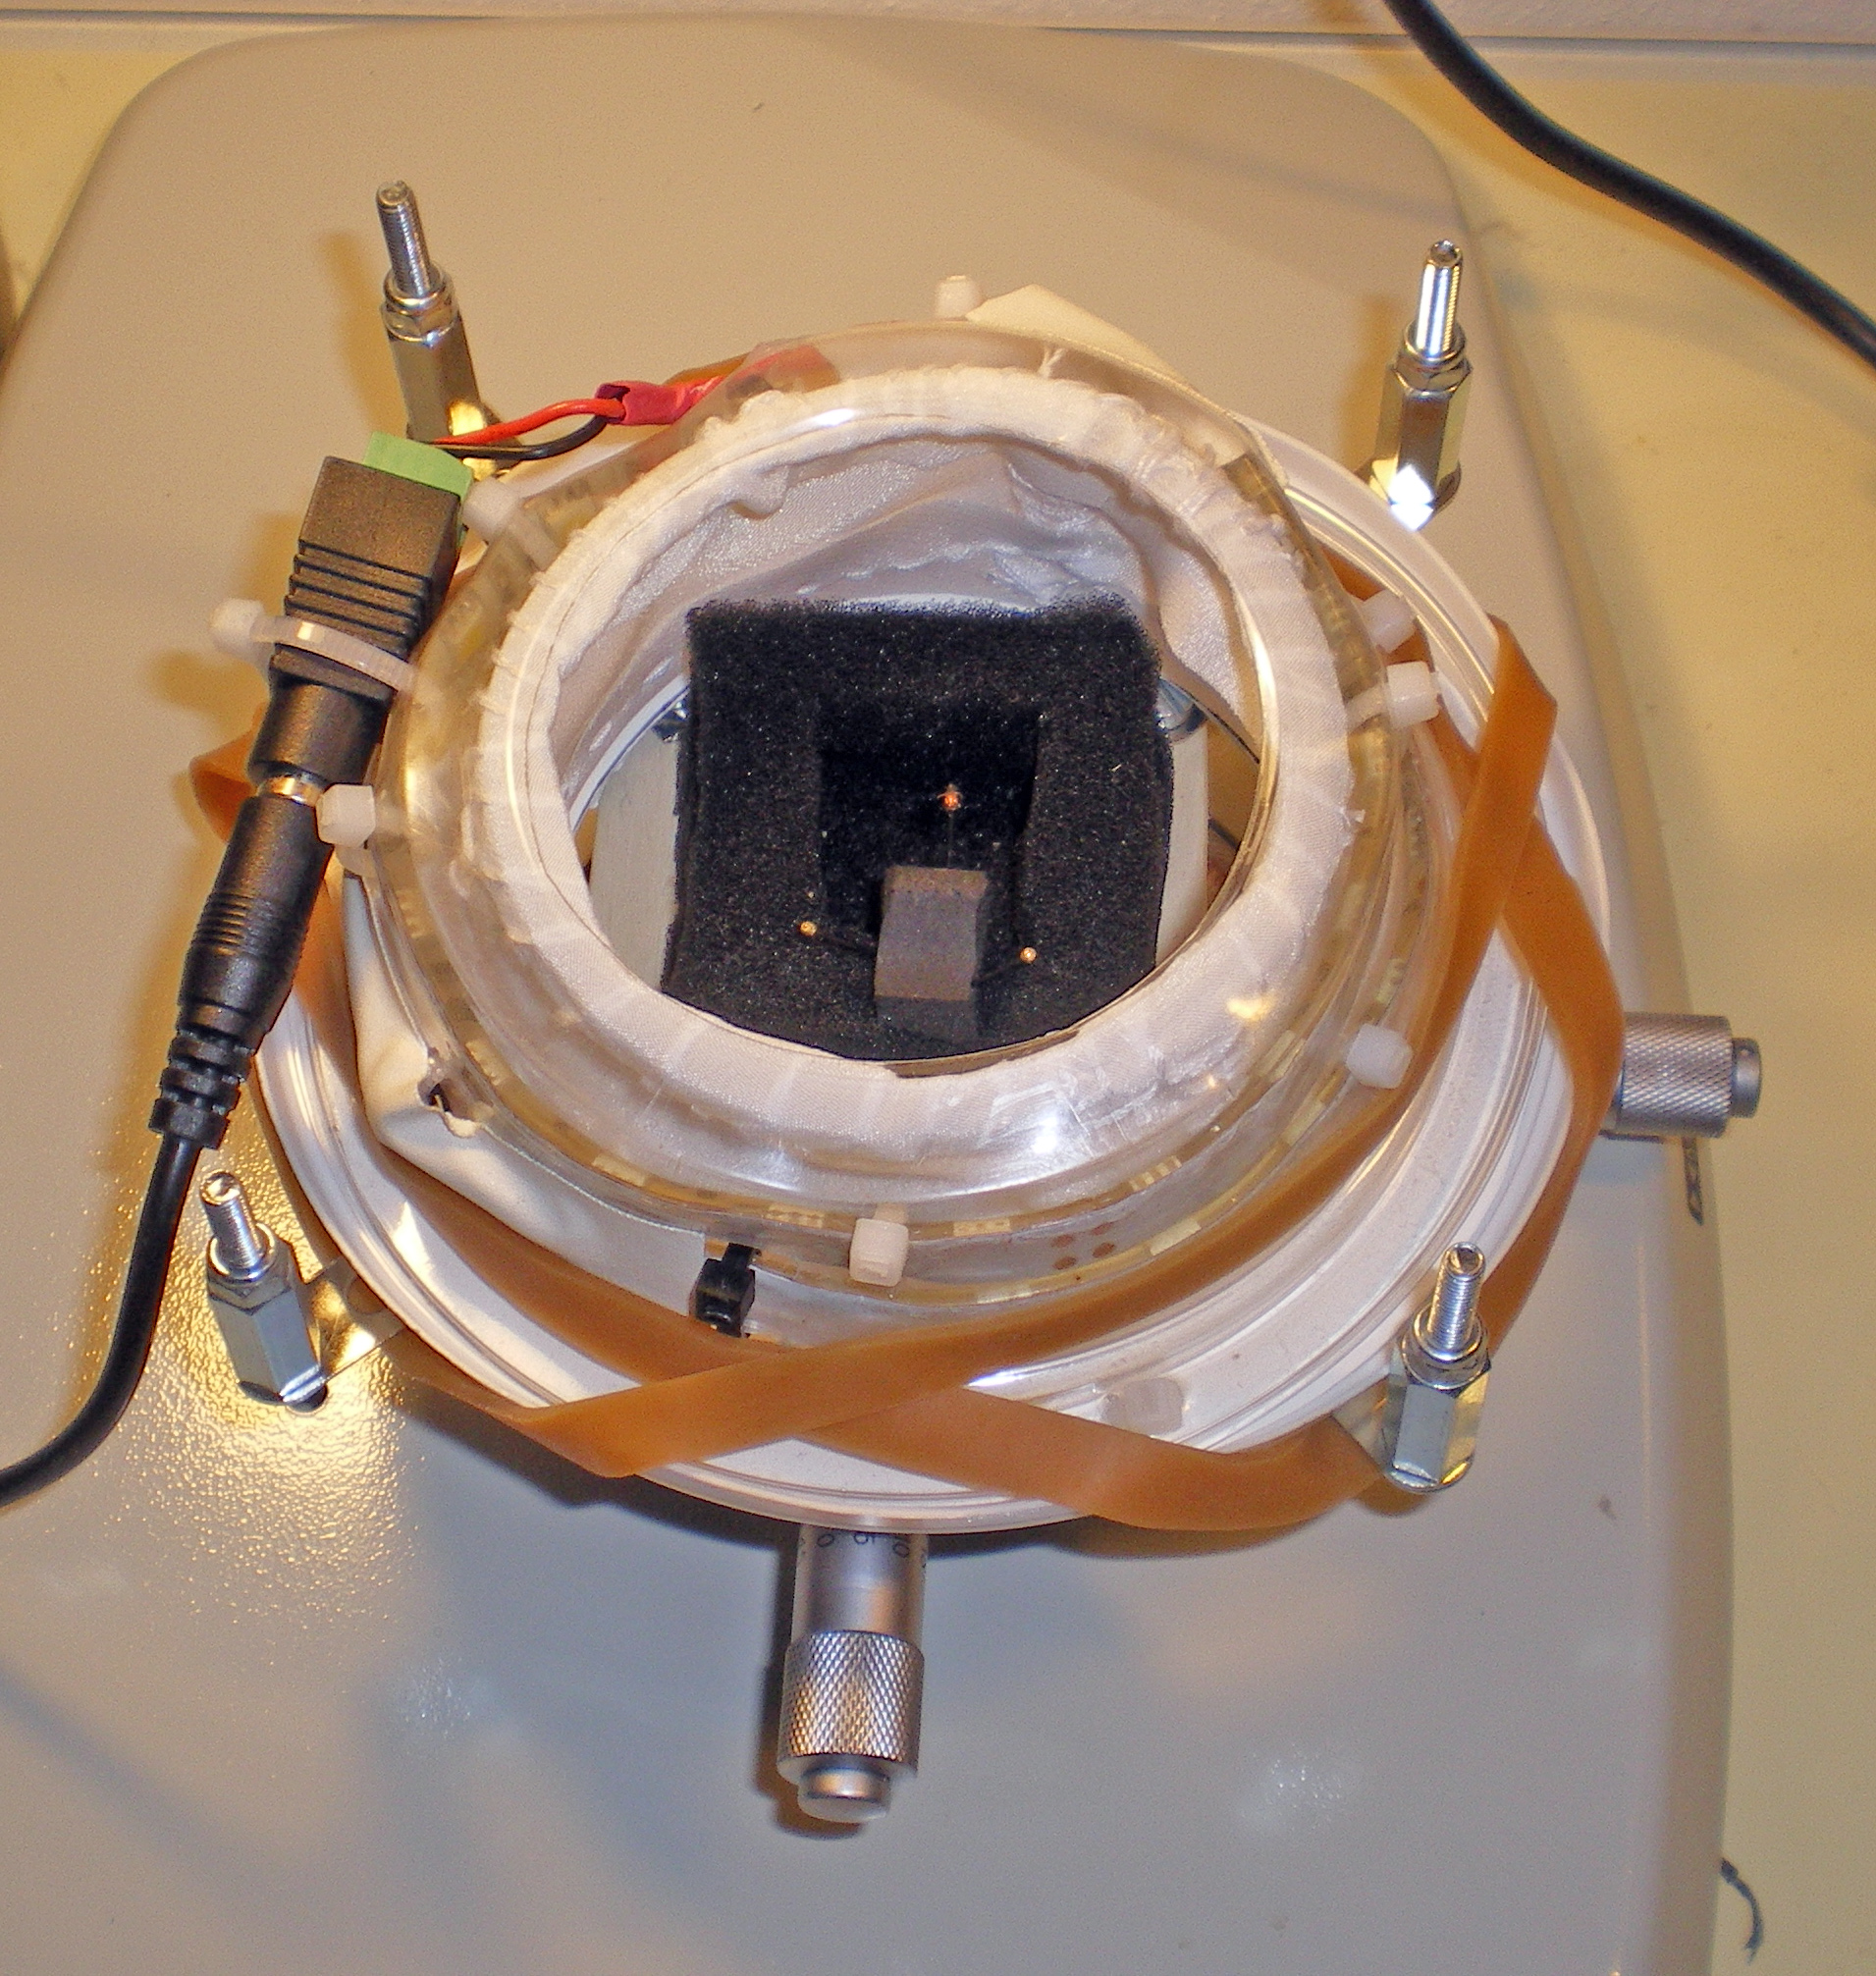
Con l'obiettivo 10x, la distanza tra la parte anteriore dell'obiettivo e il soggetto è di circa 9 mm. Questo pone un problema di illuminazione: con uno spazio così piccolo sopra il soggetto, è necessaria un'illuminazione diffusa molto forte.
With the 10x objective, the distance between the front of the objective and the subject is around 9mm. This poses a lighting problem: with so small a space above the subject, one needs a very strong diffused light illumination. |
|
|
|
|
|
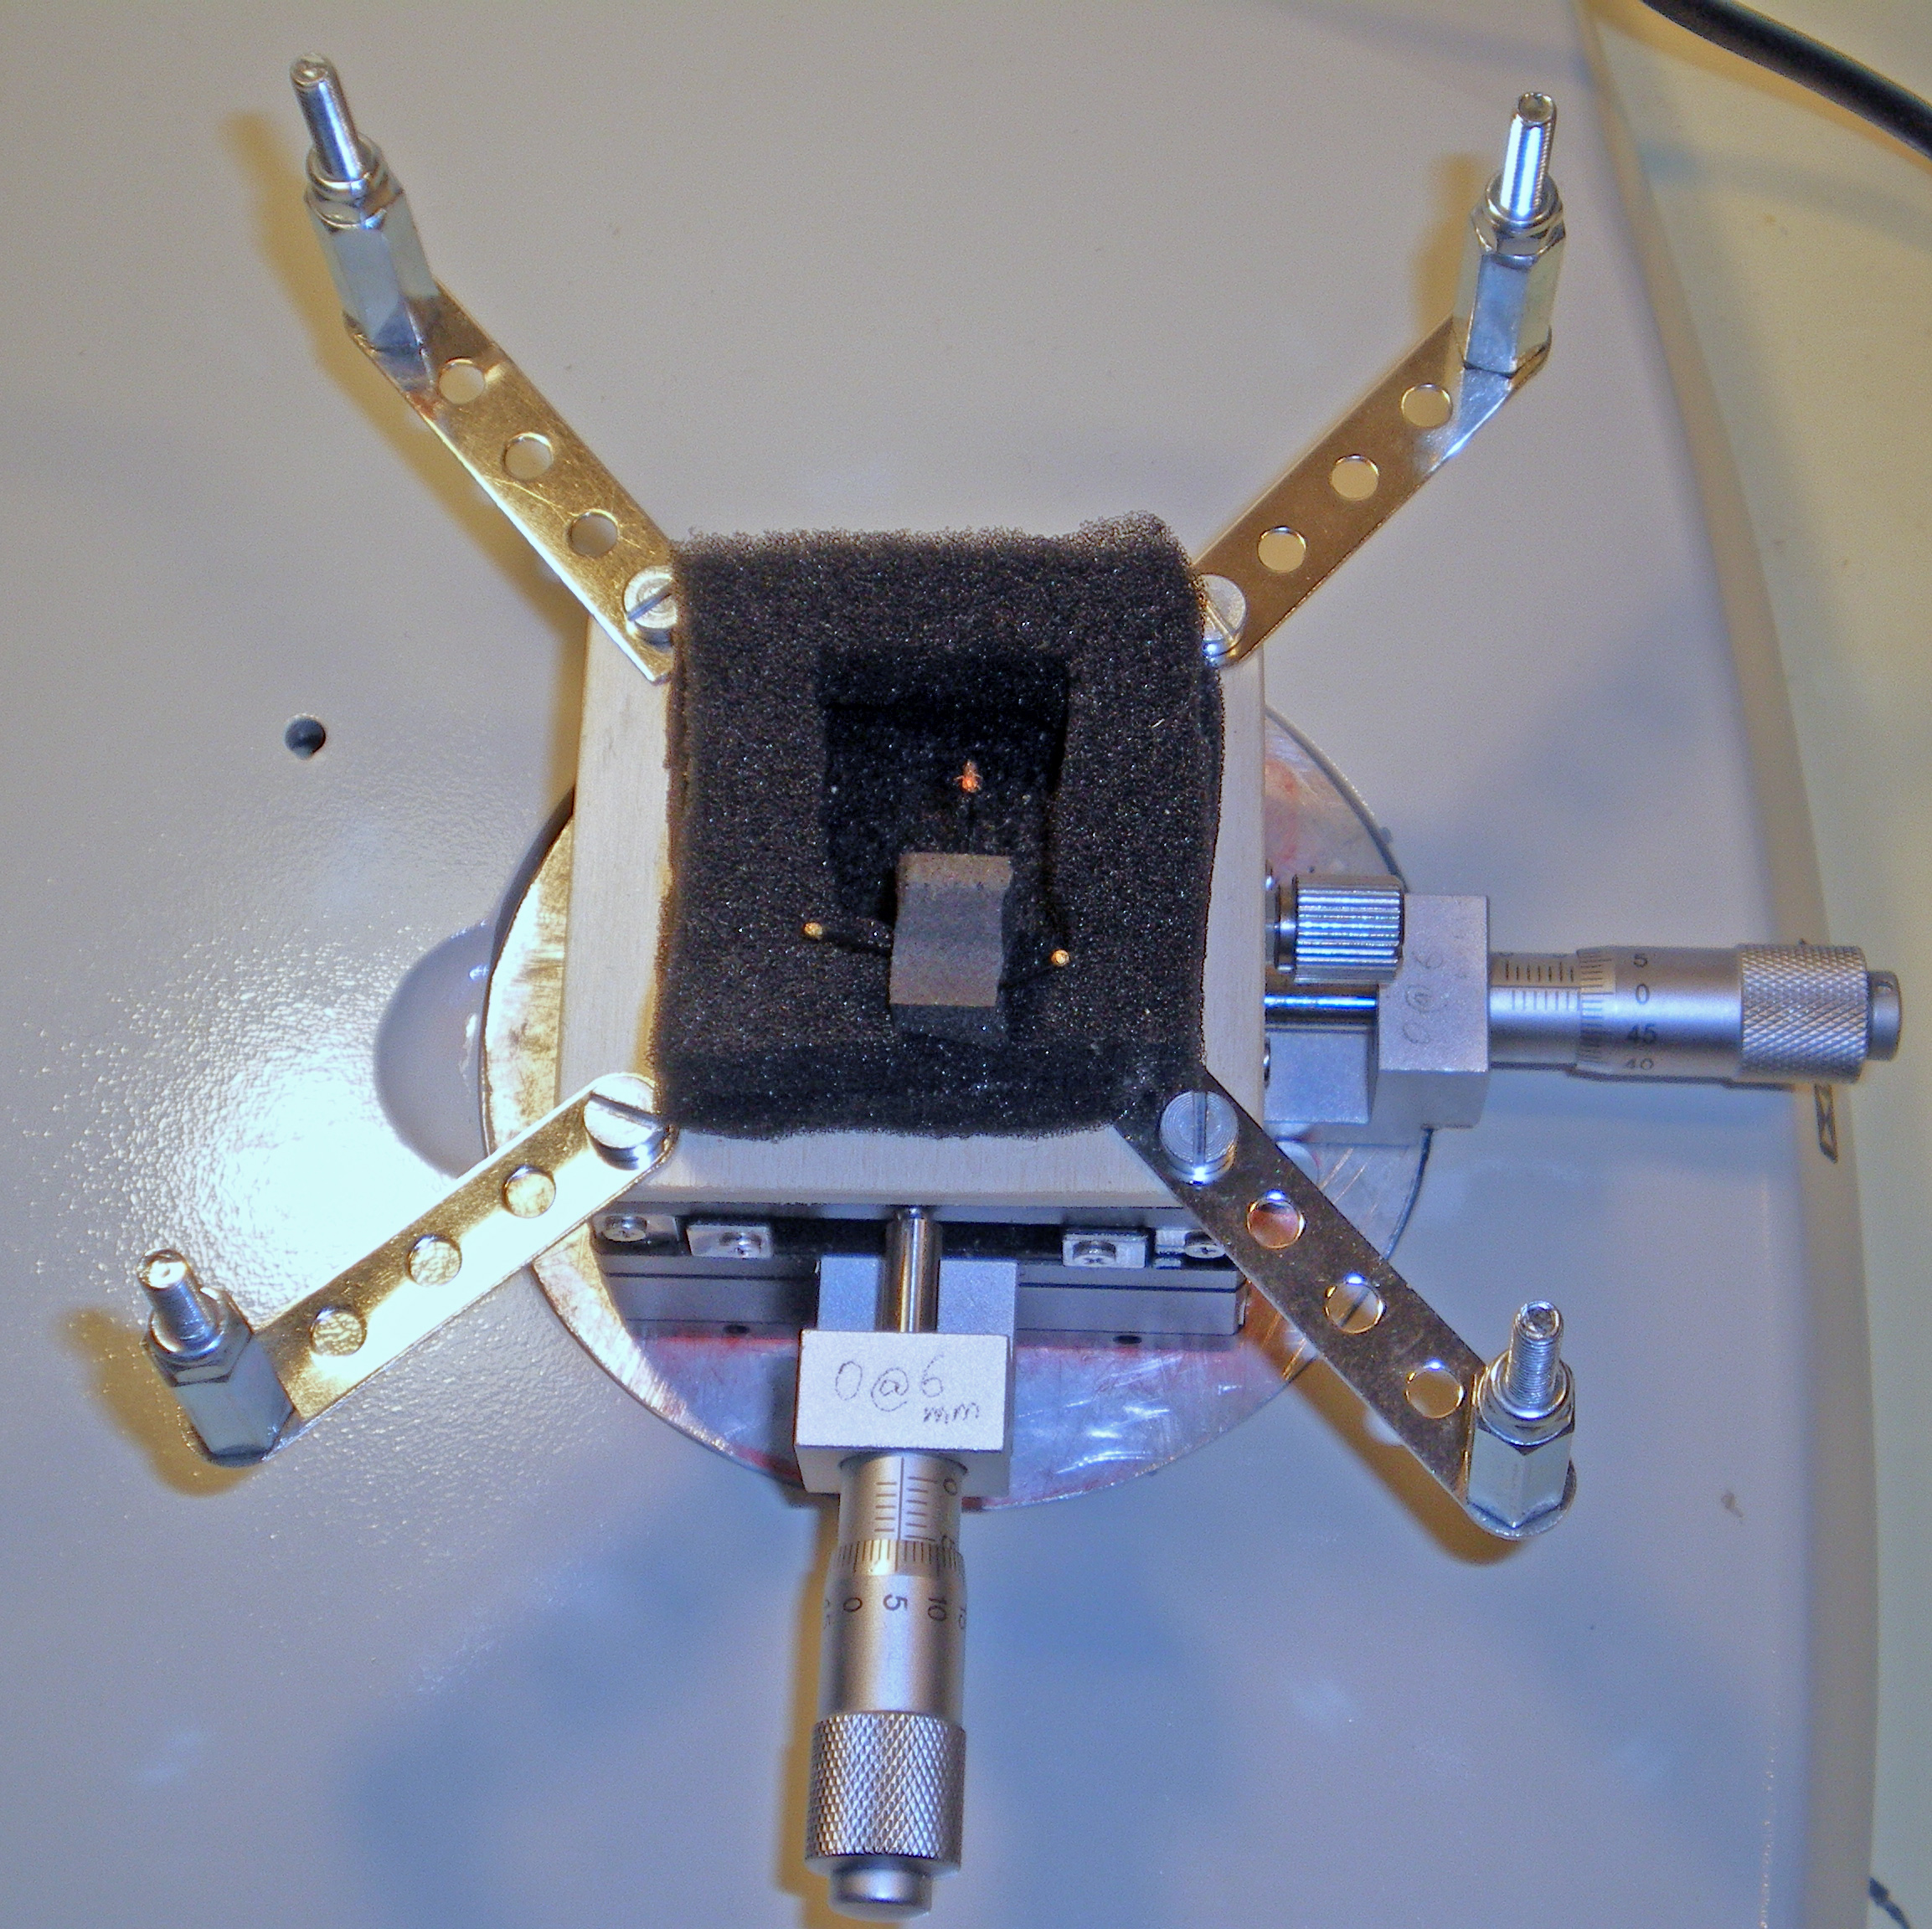
Ecco lo stadio X/Y con il portacampioni attrezzato per fotografare la testa di una formica.
Here is the X/Y stage with the sample holder prepared to photograph the head of an ant. |
|
|
|
|
|
|
|
|
Le braccia agli angoli del portacampioni consentono di inserire l'illuminatore "light box" attorno al campione. Esso è tenuto in posizione da due elastici.
The arms at the corners of the sample holder allow to insert the "light box" illuminator around the sample. It is kept in place by two rubber bands.
|
|
|
|
|
|
I primi risultati non sono stati troppo deludenti. Le immagini sono state catturate e impilate con il software DeltaPix InSight.
First results weren't too disappointing. The pictures were taken and stacked with DeltaPix InSight software.
|
|
|
|
|
|
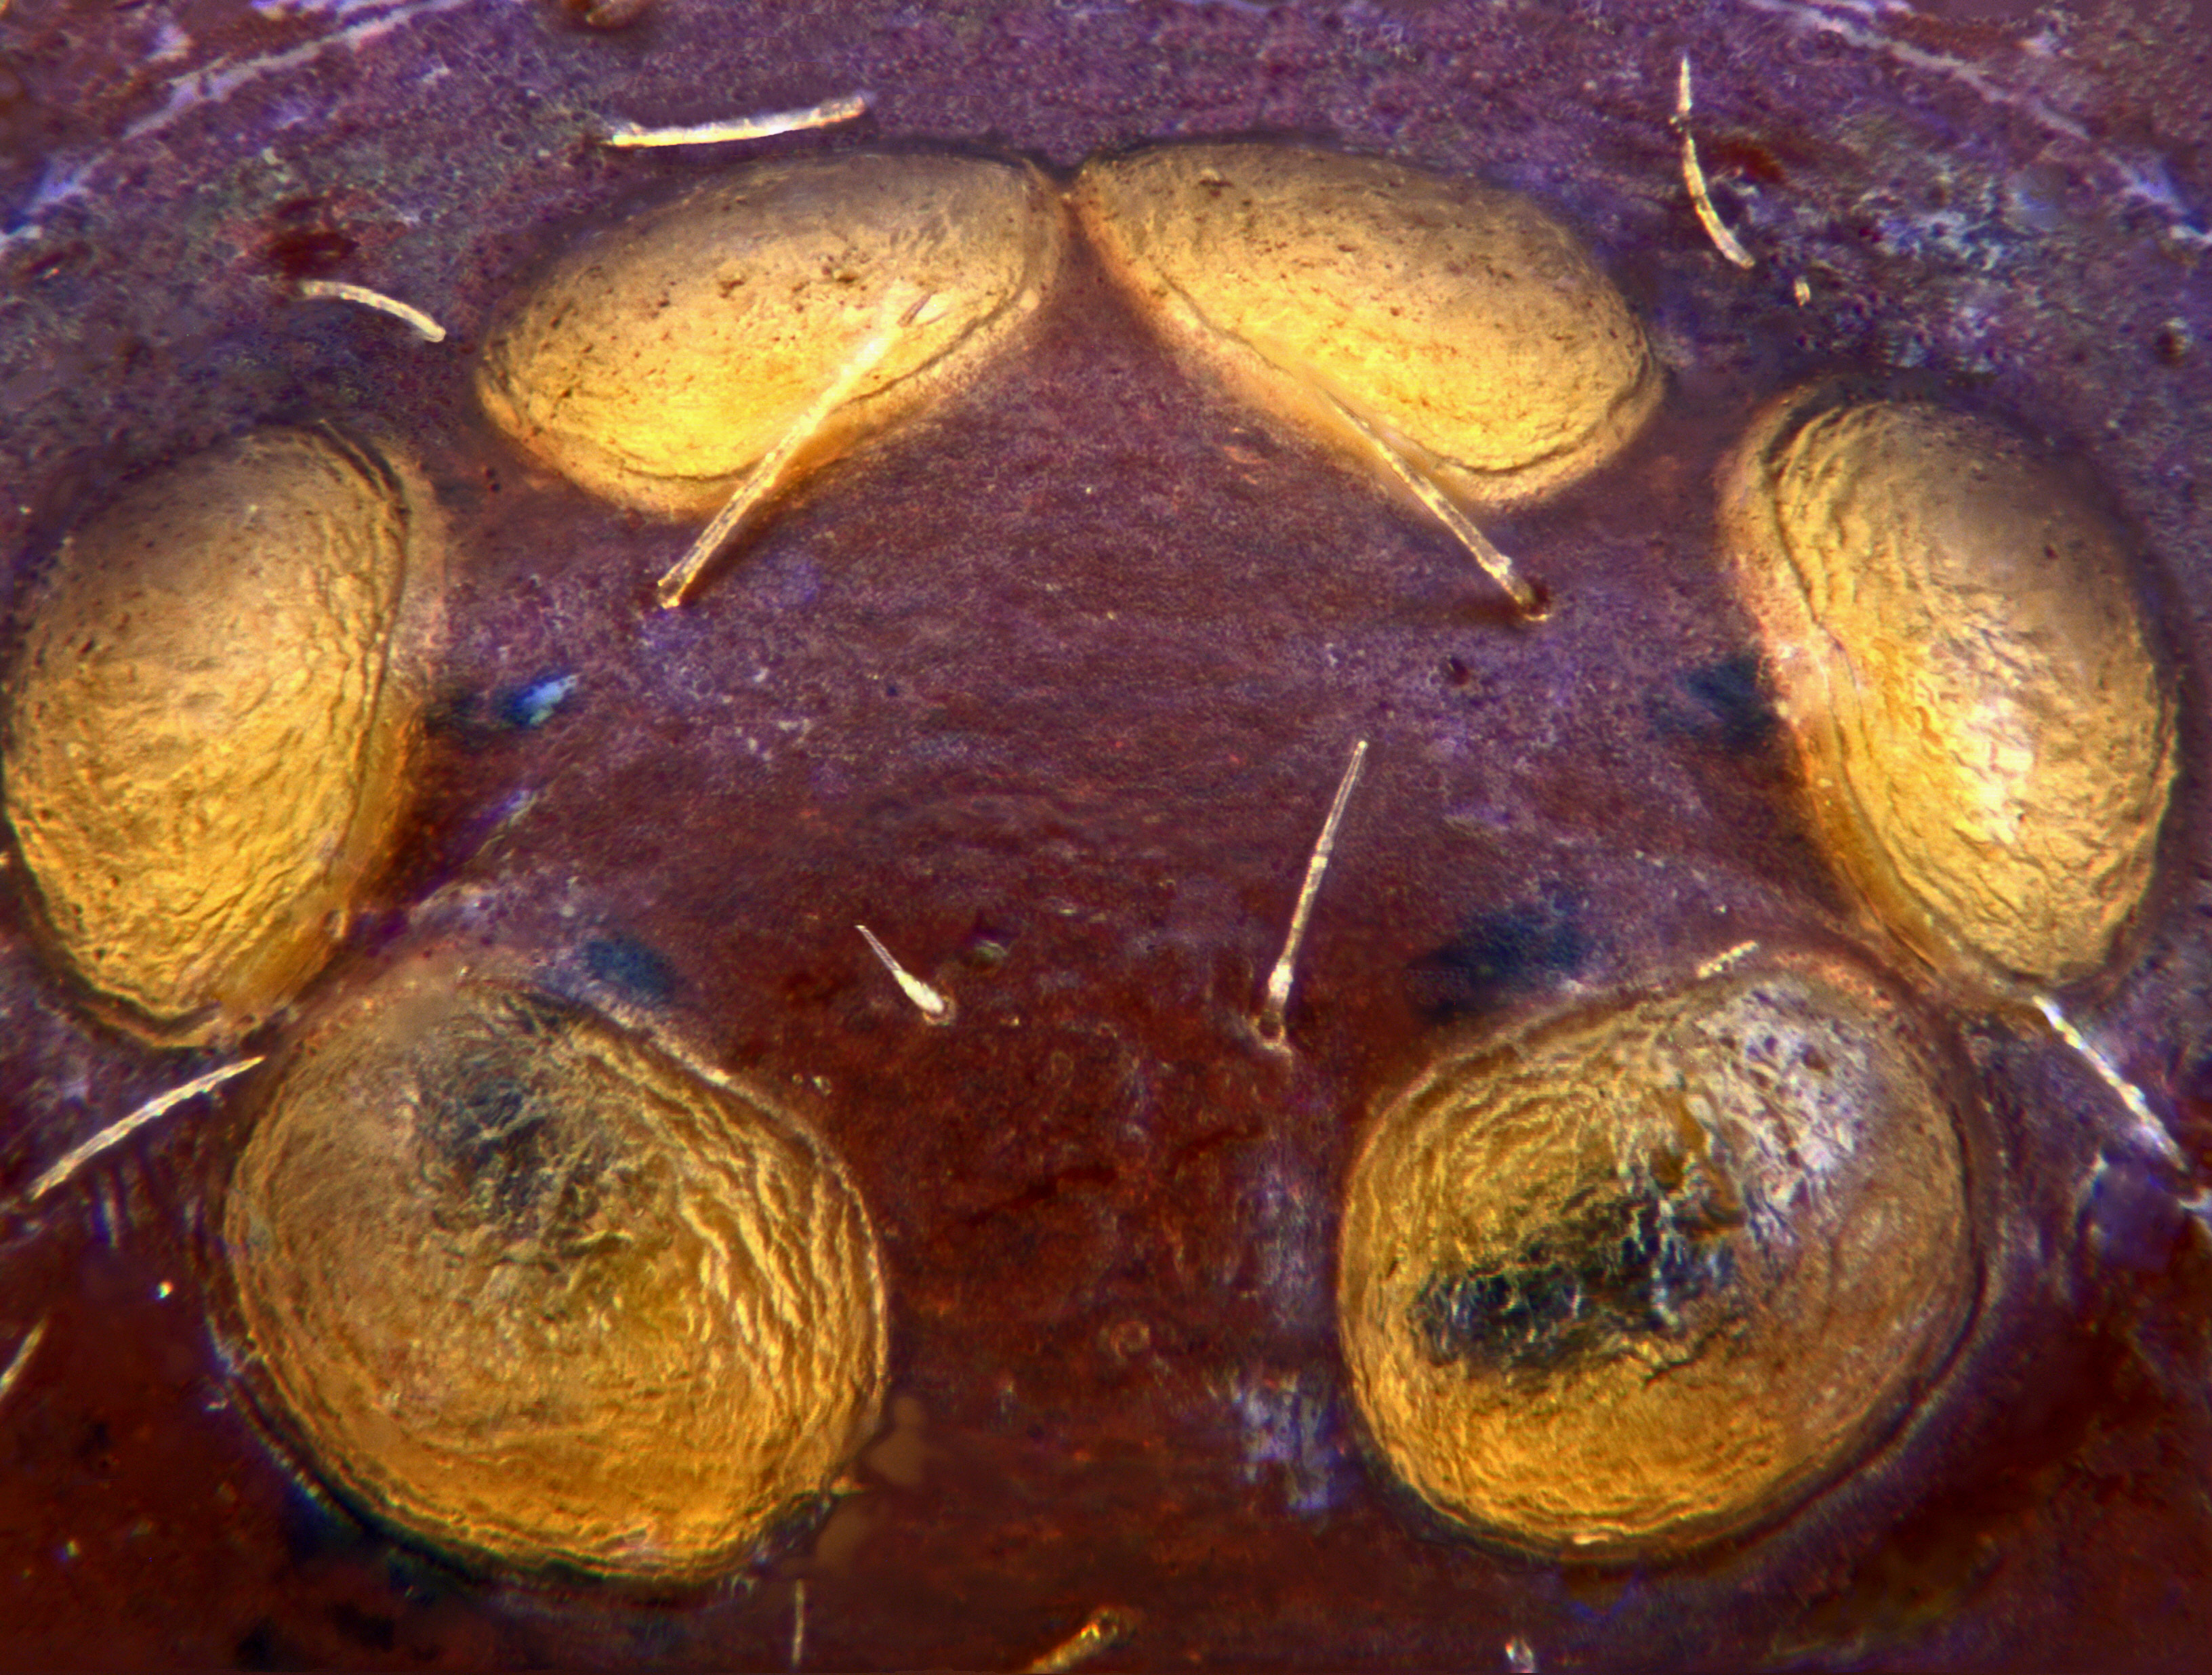
Tubercolo oculare di un ragno dalla Grecia, della famiglia Dysderidae. Larghezza immagine: circa 0,6mm, 3264x2472px. Z-stack di 32 immagini generato con DeltaPix InSight, obiettivo Leitz Pl fl 10/0.30, videocamera DeltaPix Invenio 8DII
Ocular tubercle of a spider from Greece, in the family Dysderidae. Image width: around 0.6mm, 3264x2472px. Z-stack of 32 images generated with DeltaPix InSight, objective Leitz Pl fl 10/0.30, videocamera DeltaPix Invenio 8DII
|
|
|
|
|
|
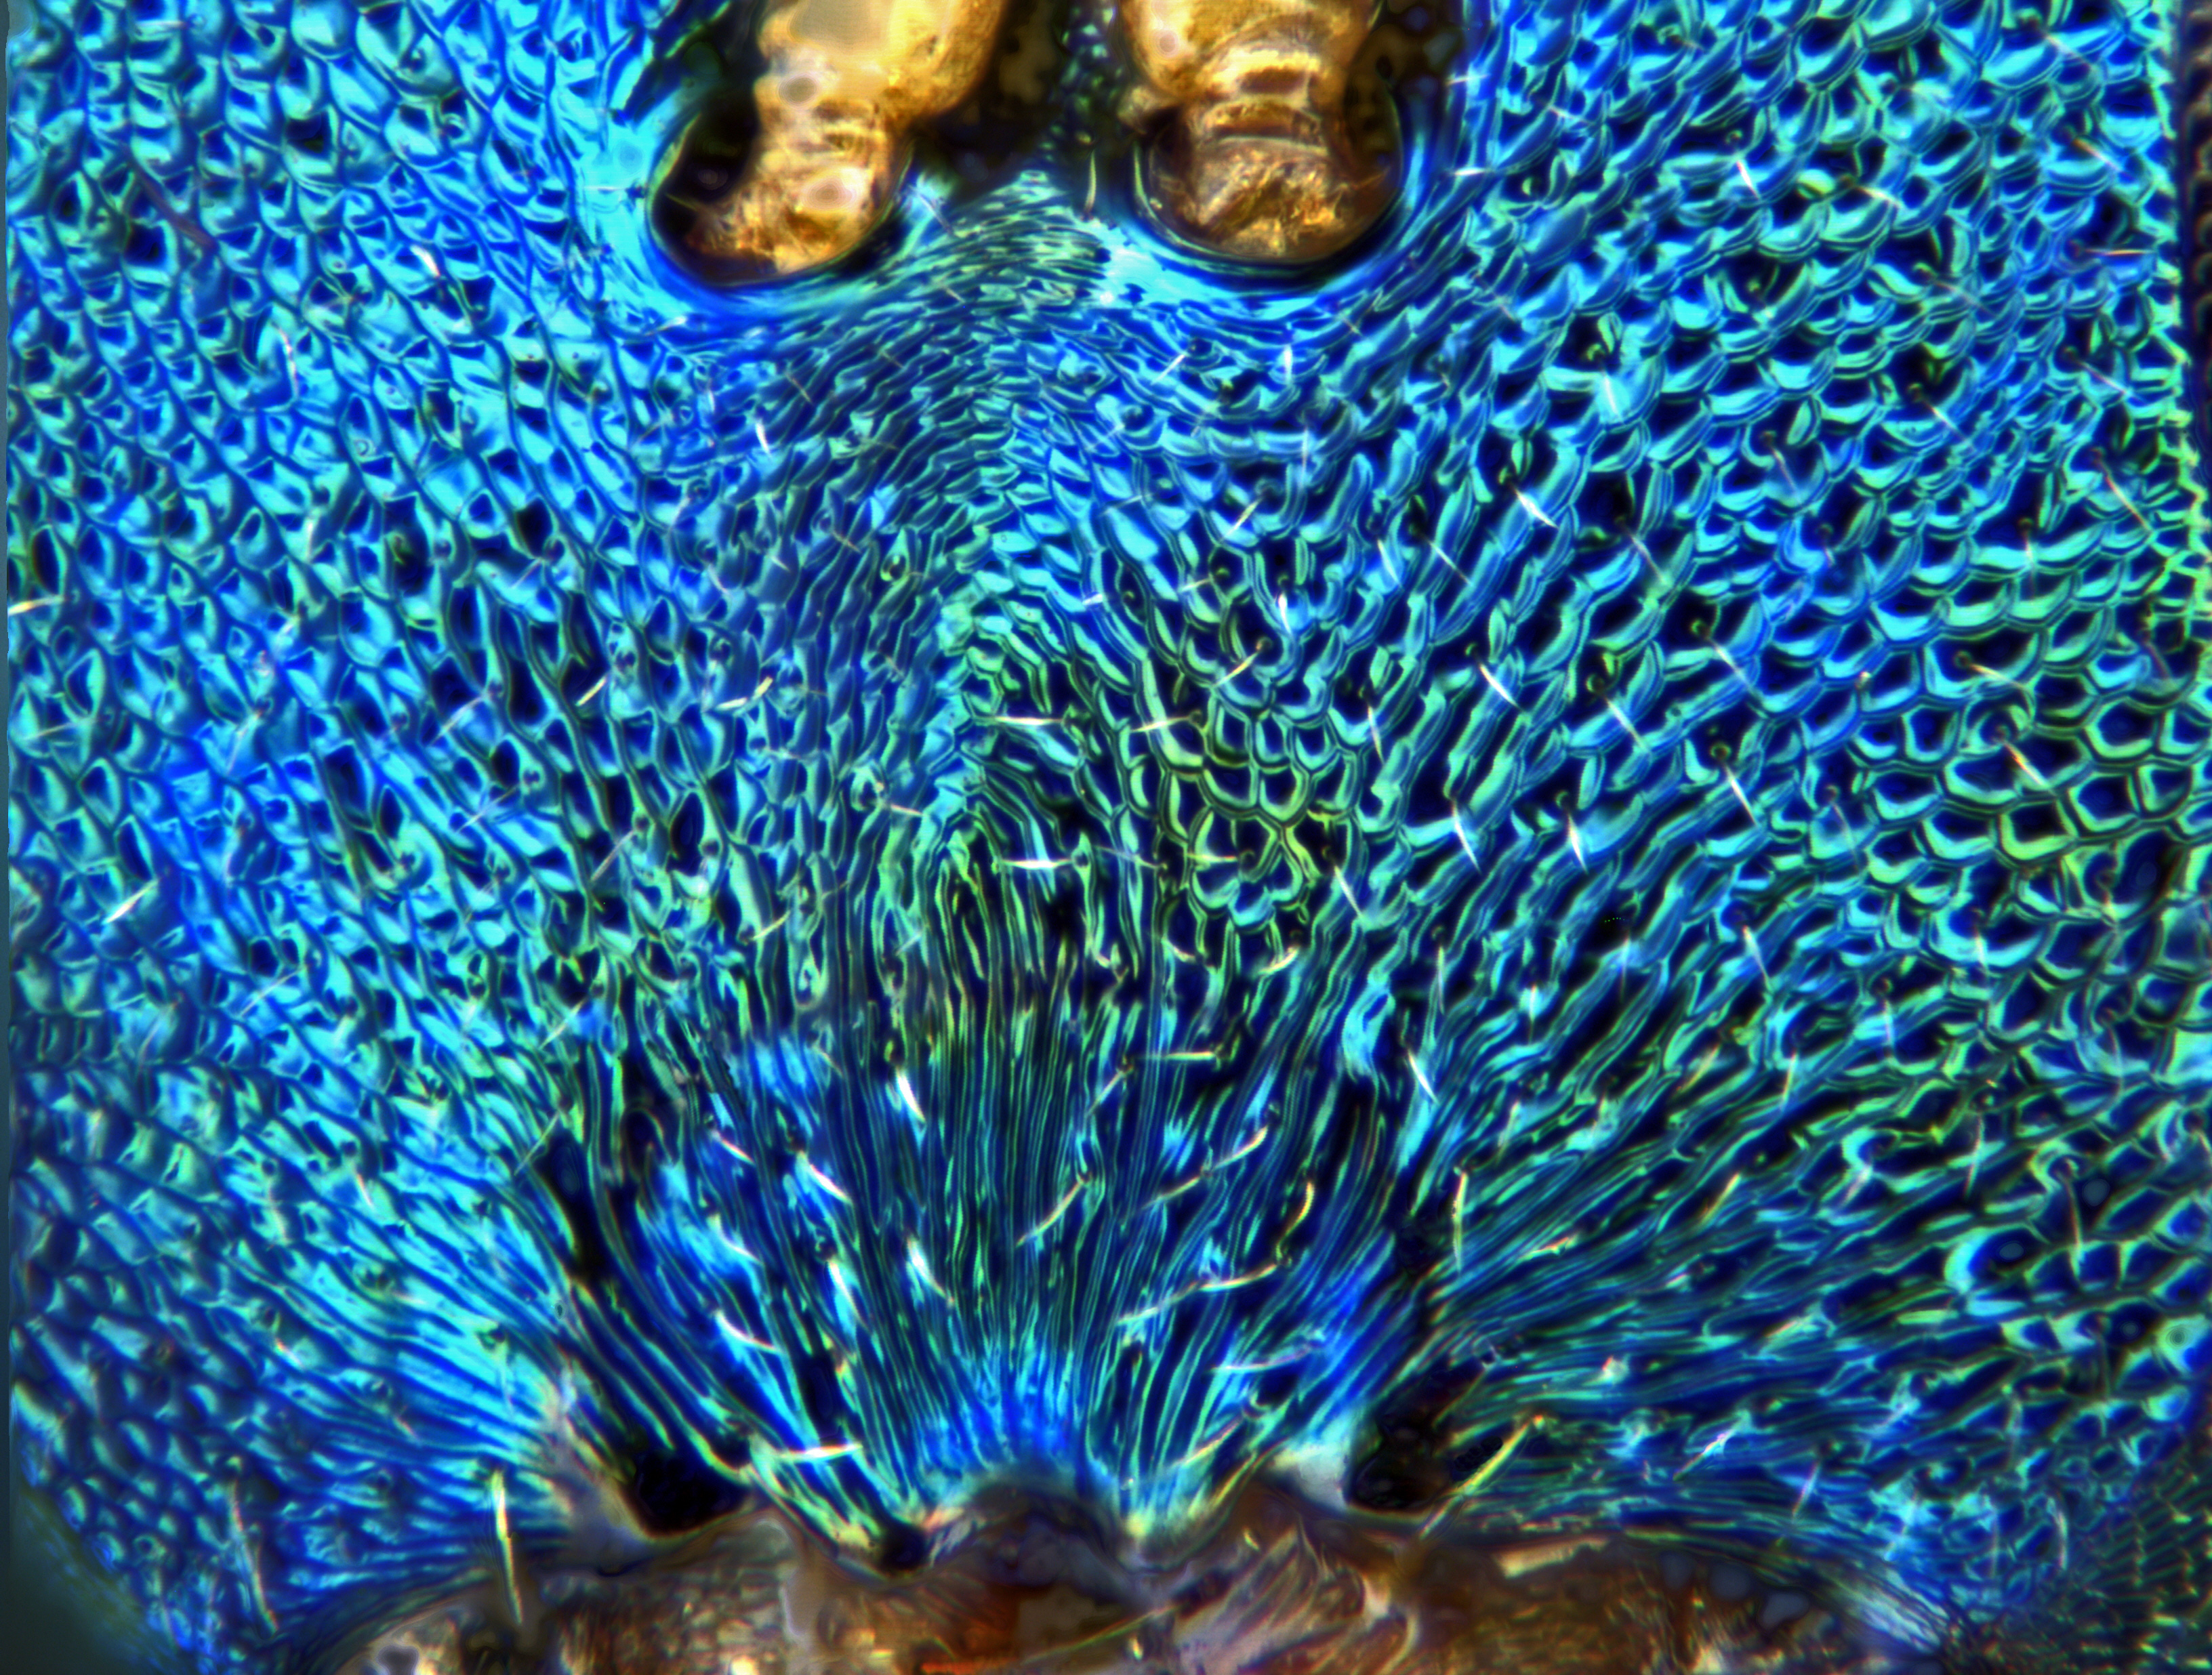
Dettaglio della testa di una vespa parassita del genere Torymus (specie auratus o affinis). Larghezza immagine: circa 0,6mm, 3264x2472px. Z-stack di 30 immagini generato con DeltaPix InSight, obiettivo Leitz Pl fl 10/0.30, videocamera DeltaPix Invenio 8DII
Detail from the head of a parasite wasp in the genus Torymus (species auratus or affinis). Image width: around 0.6mm, 3264x2472px. Z-stack of 30 images generated with DeltaPix InSight, objective Leitz Pl fl 10/0.30, videocamera DeltaPix Invenio 8DII
|
|
|
|
|
|
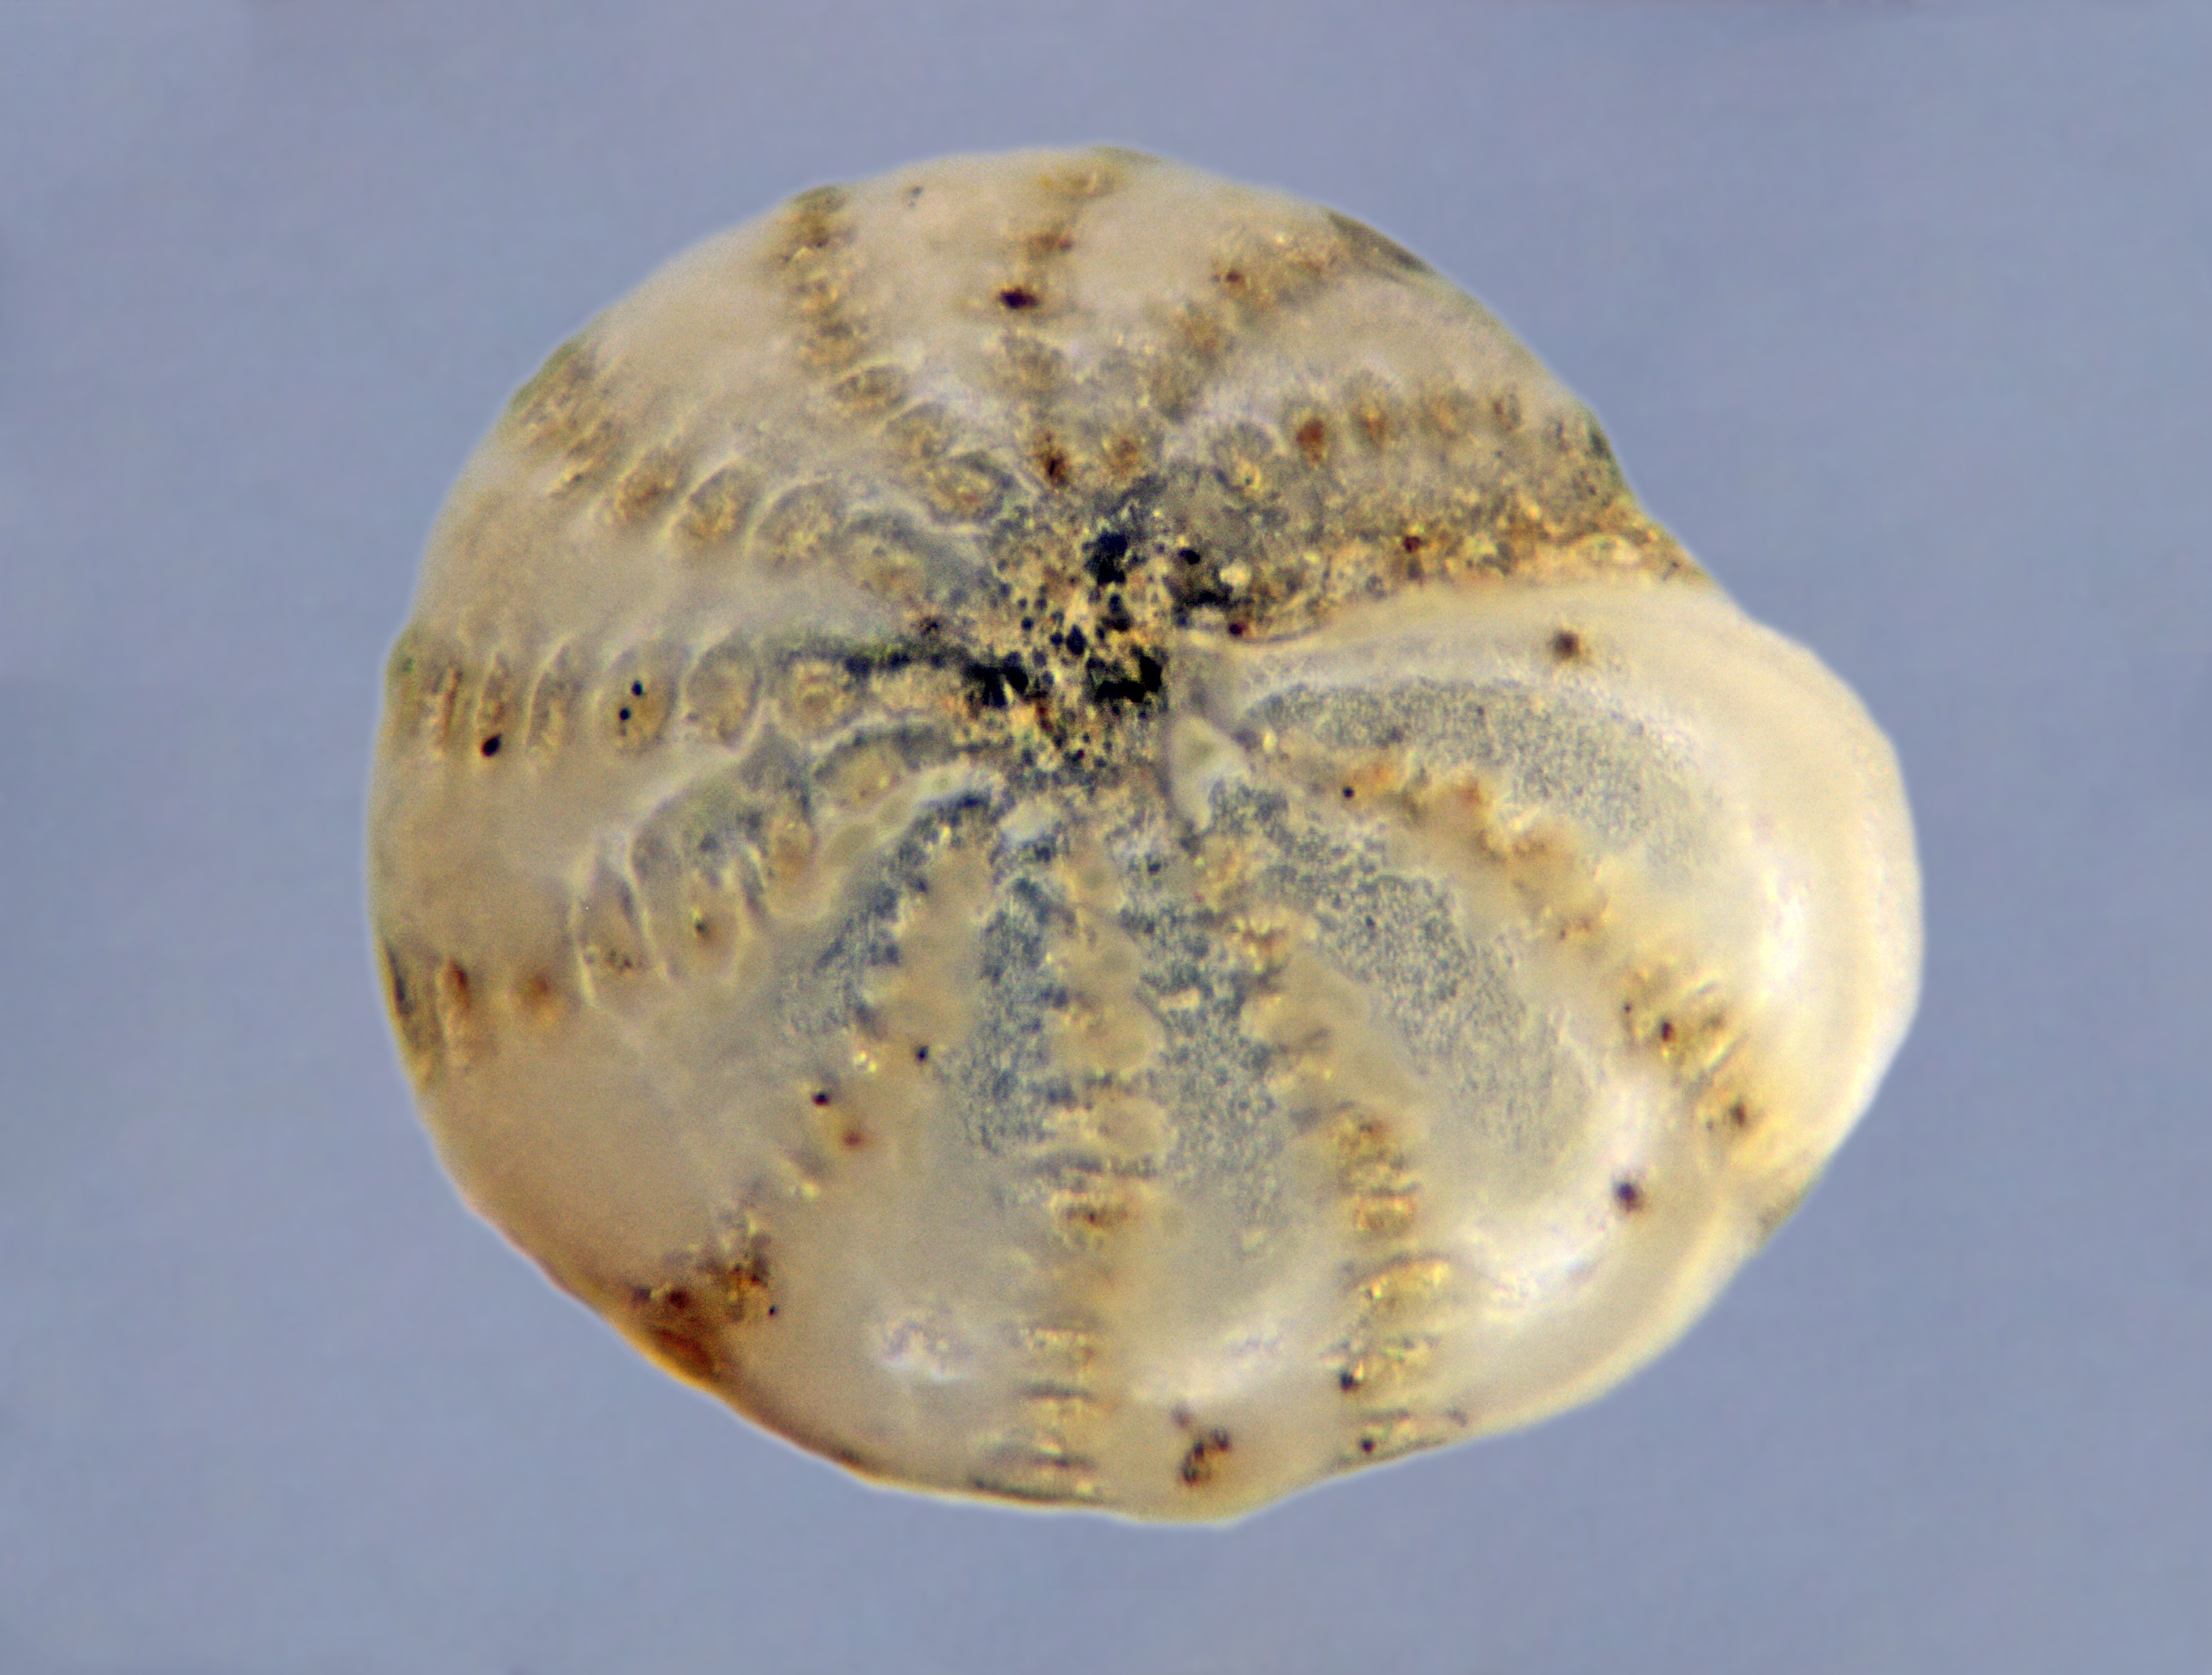
Il foraminifero Elphidium margaritaceum dalle coste del Dorset. Larghezza immagine: circa 0,6mm, 3264x2472px. Z-stack di 39 immagini generato con DeltaPix InSight, obiettivo Leitz Pl fl 10/0.30, videocamera DeltaPix Invenio 8DII
The Foraminiferan Elphidium margaritaceum from the coasts of Dorset. Image width: around 0.6mm, 3264x2472px. Z-stack of 39 images generated with DeltaPix InSight, objective Leitz Pl fl 10/0.30, videocamera DeltaPix Invenio 8DII
|
|
|
|
|
|
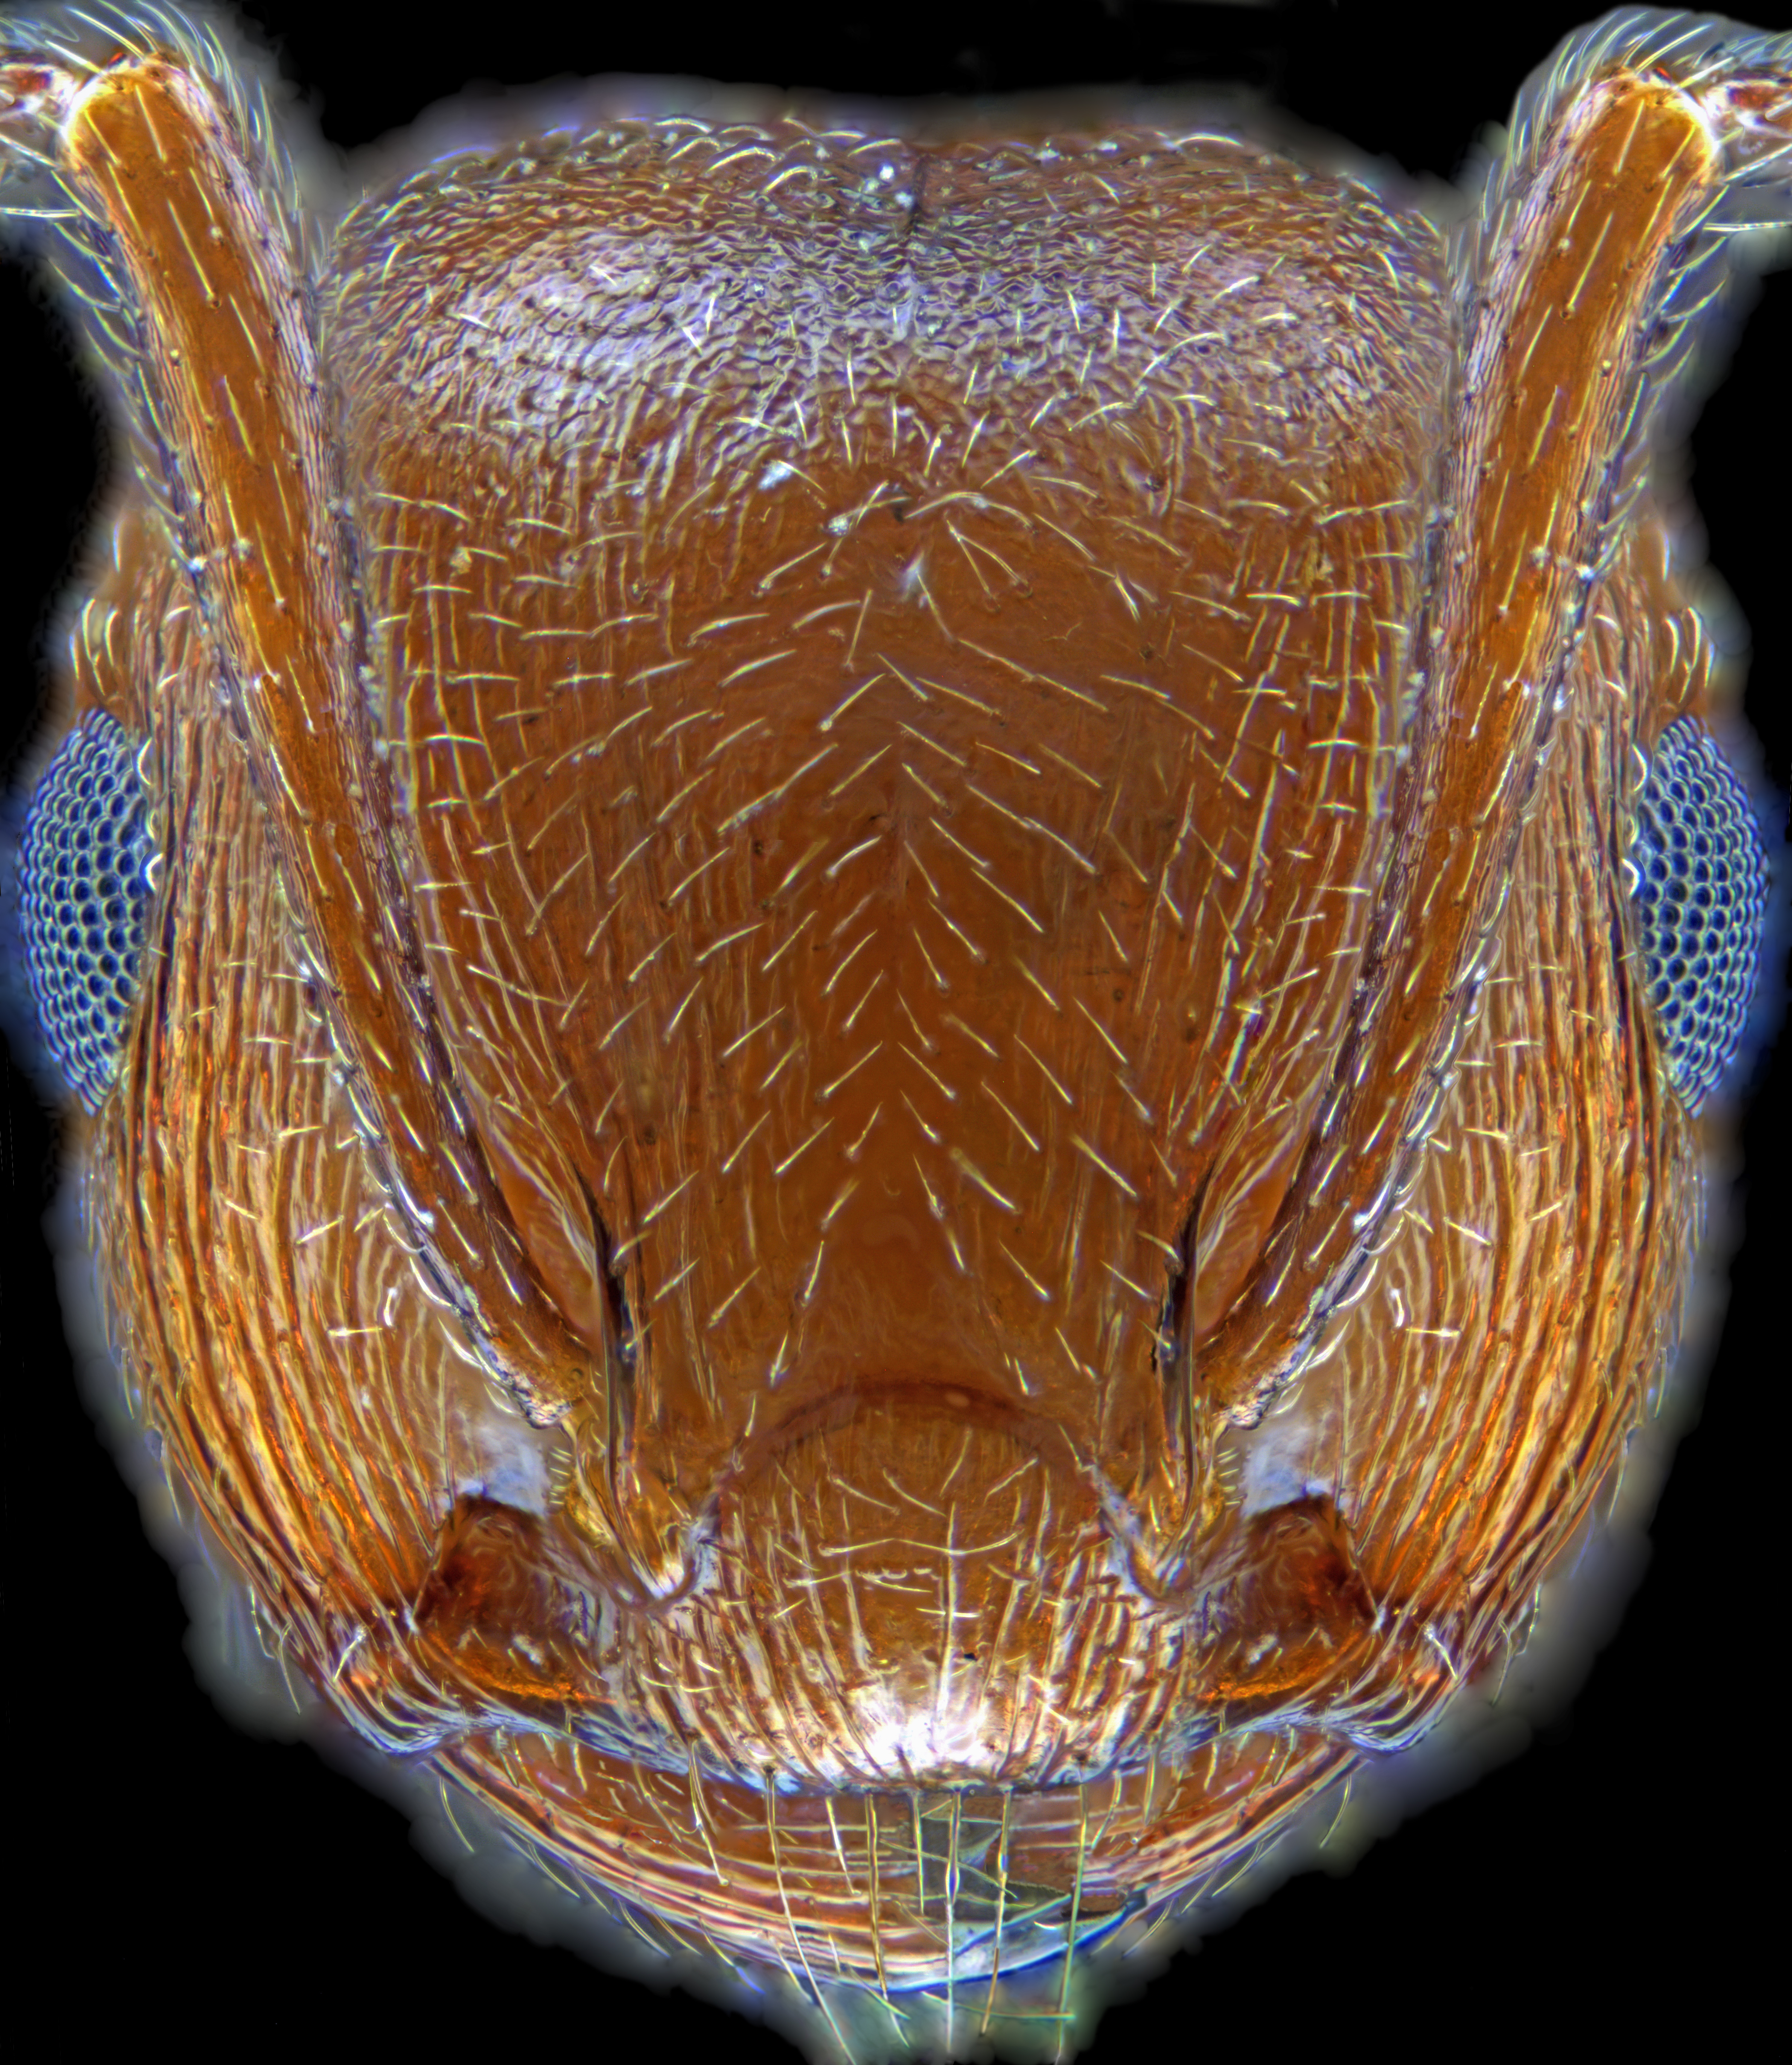
Testa del maschio alato della formica Pheidole pallidula da Portixeddu, Sardegna. Immagine ottenuta con parziale duplicazione dell'originale, che inquadrava solamente circa metà della testa.
Head of a winged male of the ant Pheidole pallidula from Portixeddu, Sardinia. Image obtained by partial duplication of the original, that framed just around half of the head. Image width: around 1mm, 4630x2454px. Z-stack of 43 images generated with DeltaPix InSight, objective Leitz Pl fl 10/0.30, videocamera DeltaPix Invenio 8DII
|
|
|
|
|
|
Testa della formica Crematogaster scutellaris da Fluminimaggiore, Sardegna. 180 scatti, sei colonne più parziale mirroring di tre colonne.
Head of an ant Crematogaster scutellaris from Fluminimaggiore, Sardinia. 180 shots, six columns plus partial mirroring of three columns. |
|